No-code and automation for collaboration.
Scope: Responsive website
Tools: Webflow, Airtable, Make, OpenAI, Figma, Relume
Role: UI design, no-code and automation developement
Purpose: DareIT bootcamp
Duration: 5 weeks / 60 hours
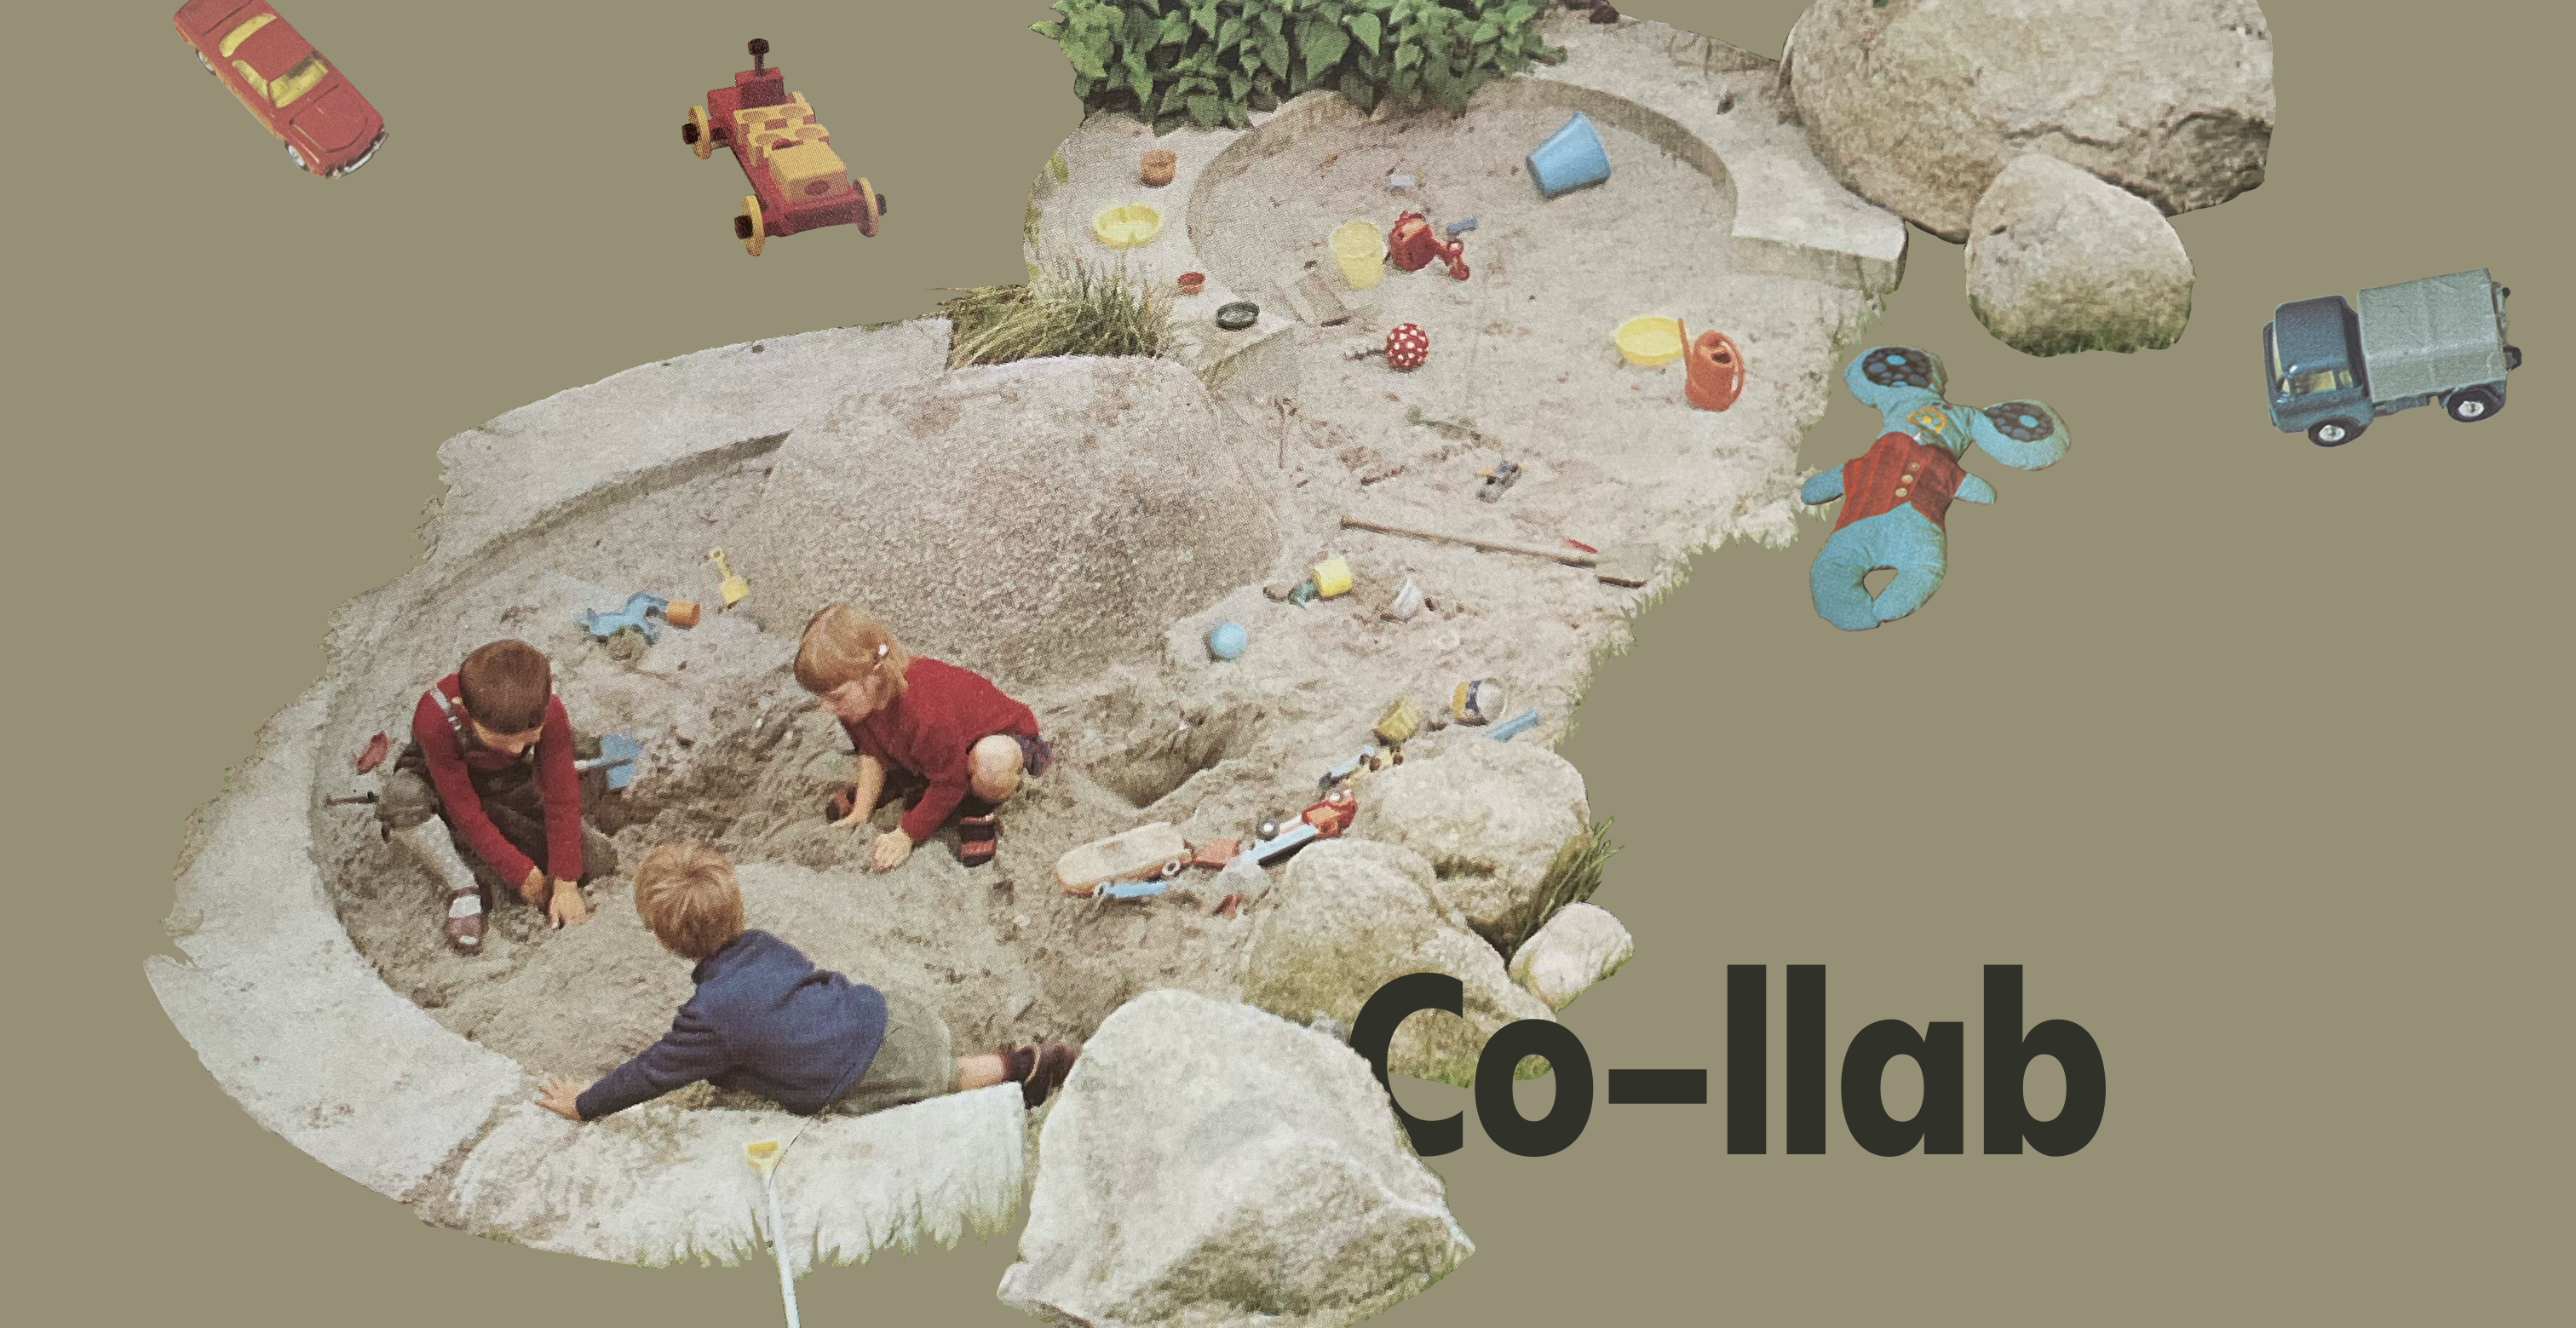
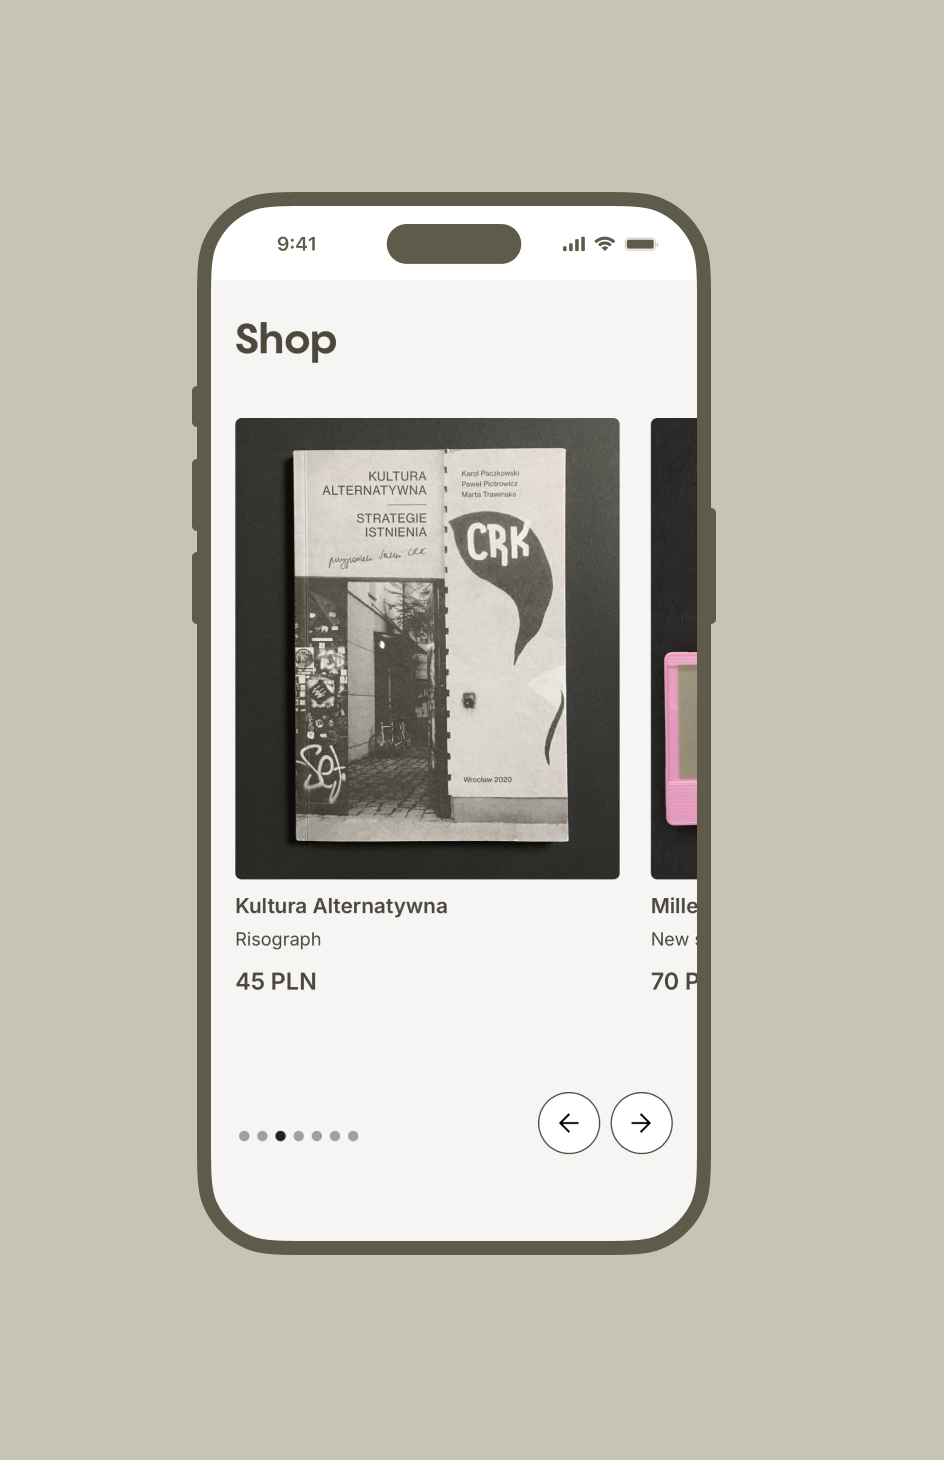
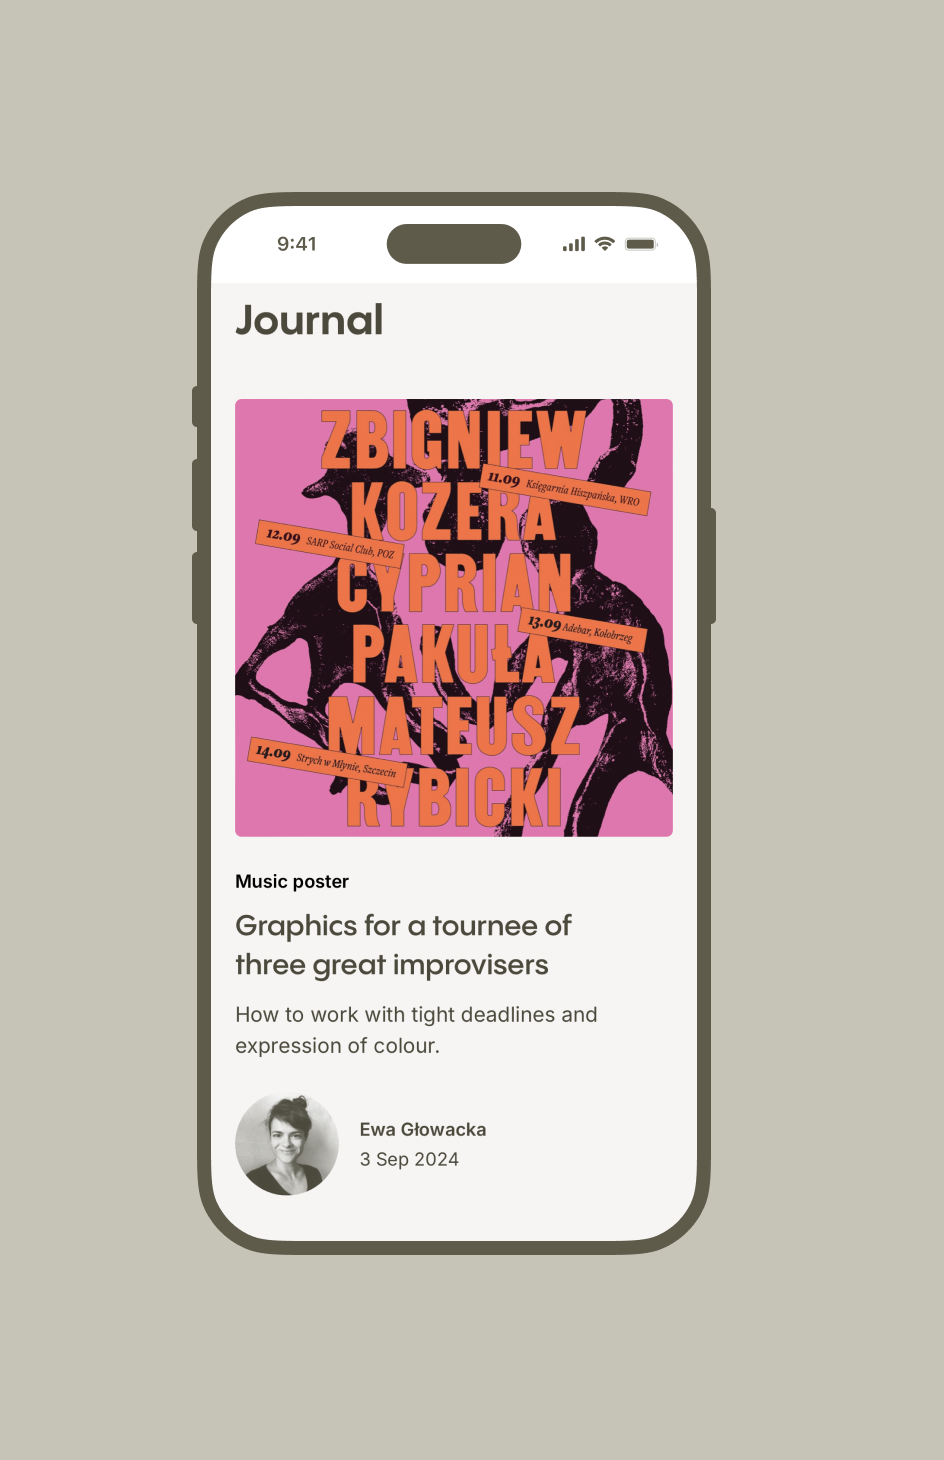
Co-llab is a digital platform for creativity and collaboration, where designers showcase projects, share services, and sell handcrafted objects.
Co-llab is a digital platform created for a group of four designers whose paths have crossed in many ways over the years—from screen-printing projects to branding and type design, you name it. Co-llab brings together their unique skill sets, opening the door to closer, easier collaboration on a variety of design projects. It provides them with a space to share their creative process with a wider audience, including potential clients and fellow designers.
Although they primarily work in the digital space, they remain closely connected to analogue. The platform allows them to sell their handcrafted products and facilitate in-person creative workshops.
Co-llab was initially brought to life as an exercise for a no-code and automation bootcamp offered by DareIT. Its potential has since inspired the creators to expand it further, with plans for future development.
The challenge
Freelancing isn’t always a walk in the park. It often comes with mundane tasks that aren’t design-related but are crucial for keeping the business afloat. The goal was to use no-code and automation tools to reduce or eliminate these tasks, freeing up more time to focus on creative projects.
The aim was to minimise time spent on:
① marketing and promotion
② client communication
③ paperwork
④ website maintenance
My role
In June 2024, I joined a no-code and automation bootcamp, where I had to to build a website as a foundation for no-code and automation processes. Initially, I wasn’t too attached to the project idea, focusing mainly on exploring new tools. But as I worked through it and brought in the designers involved, everything began to fall into place.
After five weeks of intensive workshops, I created a supercharged website that gave us hope freelancing could at least become a walk in the forest. Only the homepage reached a high-fidelity stage, as the primary aim was to experiment with tools and explore smarter, more efficient ways of working.
Unleashing creative potential
In the first phase, I focused on planning the project’s functionality. It wasn’t about setting a fixed idea but rather creating a playground, a sketchbook full of concepts to explore and test later. I didn’t limit myself with scope or features, as the only real limitation of no-code is the creator’s imagination.
No-code and automation tools enable the rapid development of ideas without the need for coding. This saves time, reduces costs, and allows for quick building, testing, iterating, and evolving of a product.
Rapid web design and development
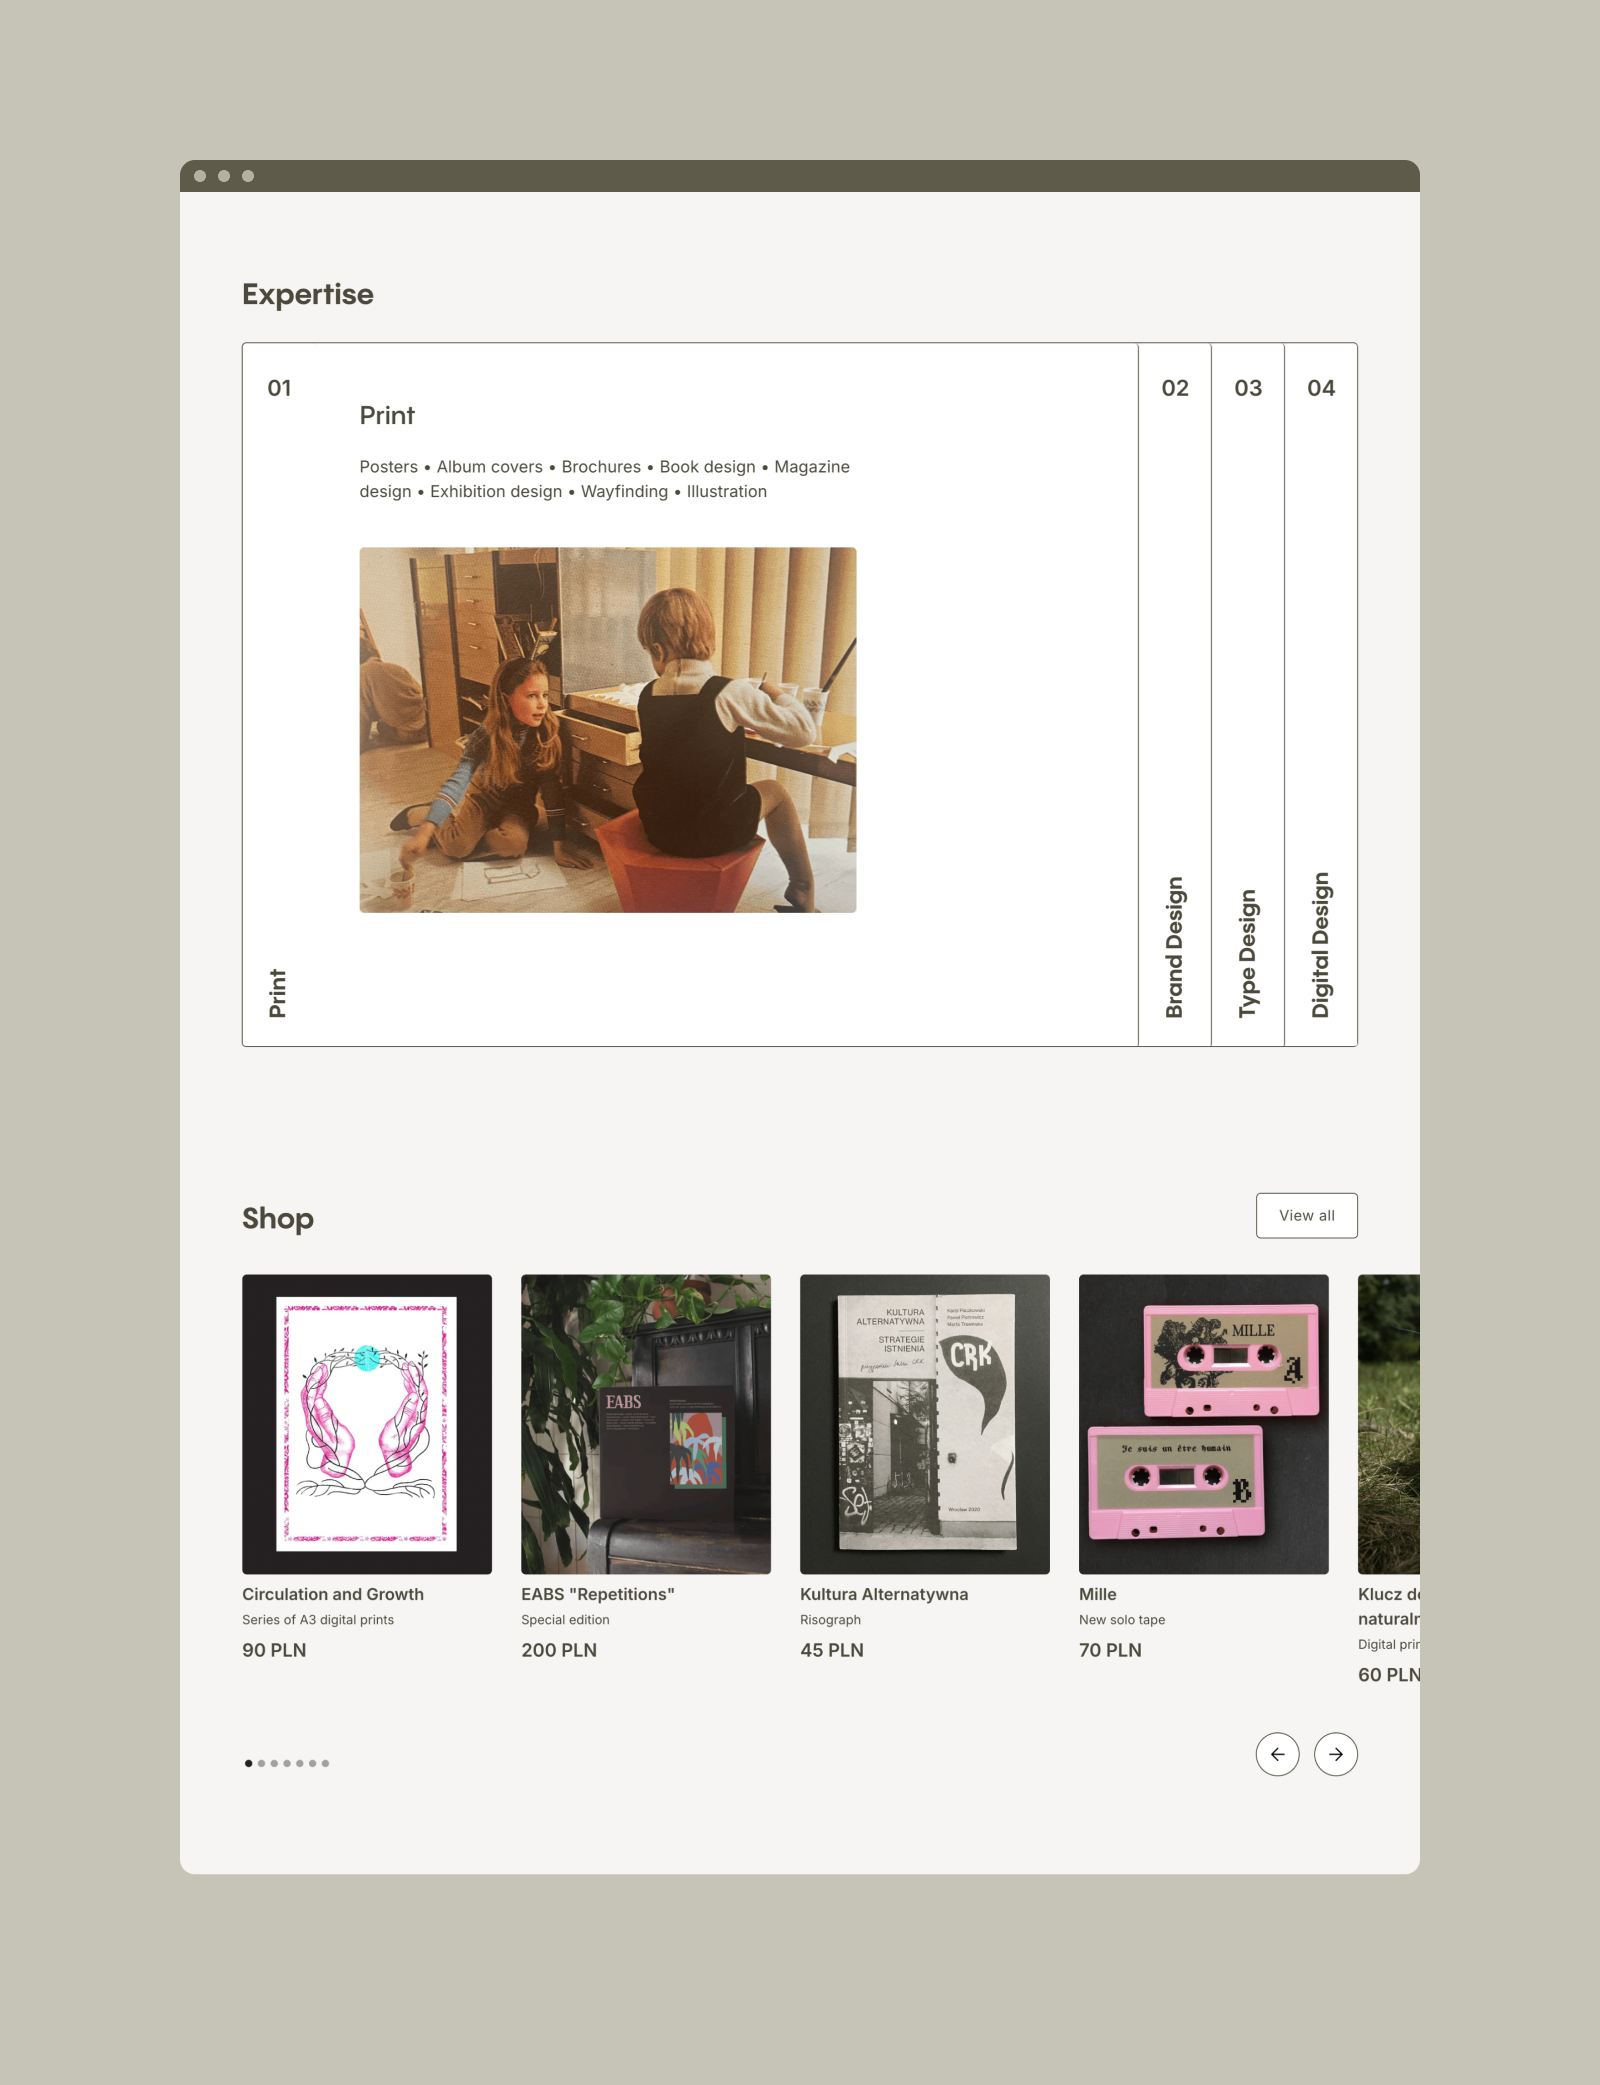
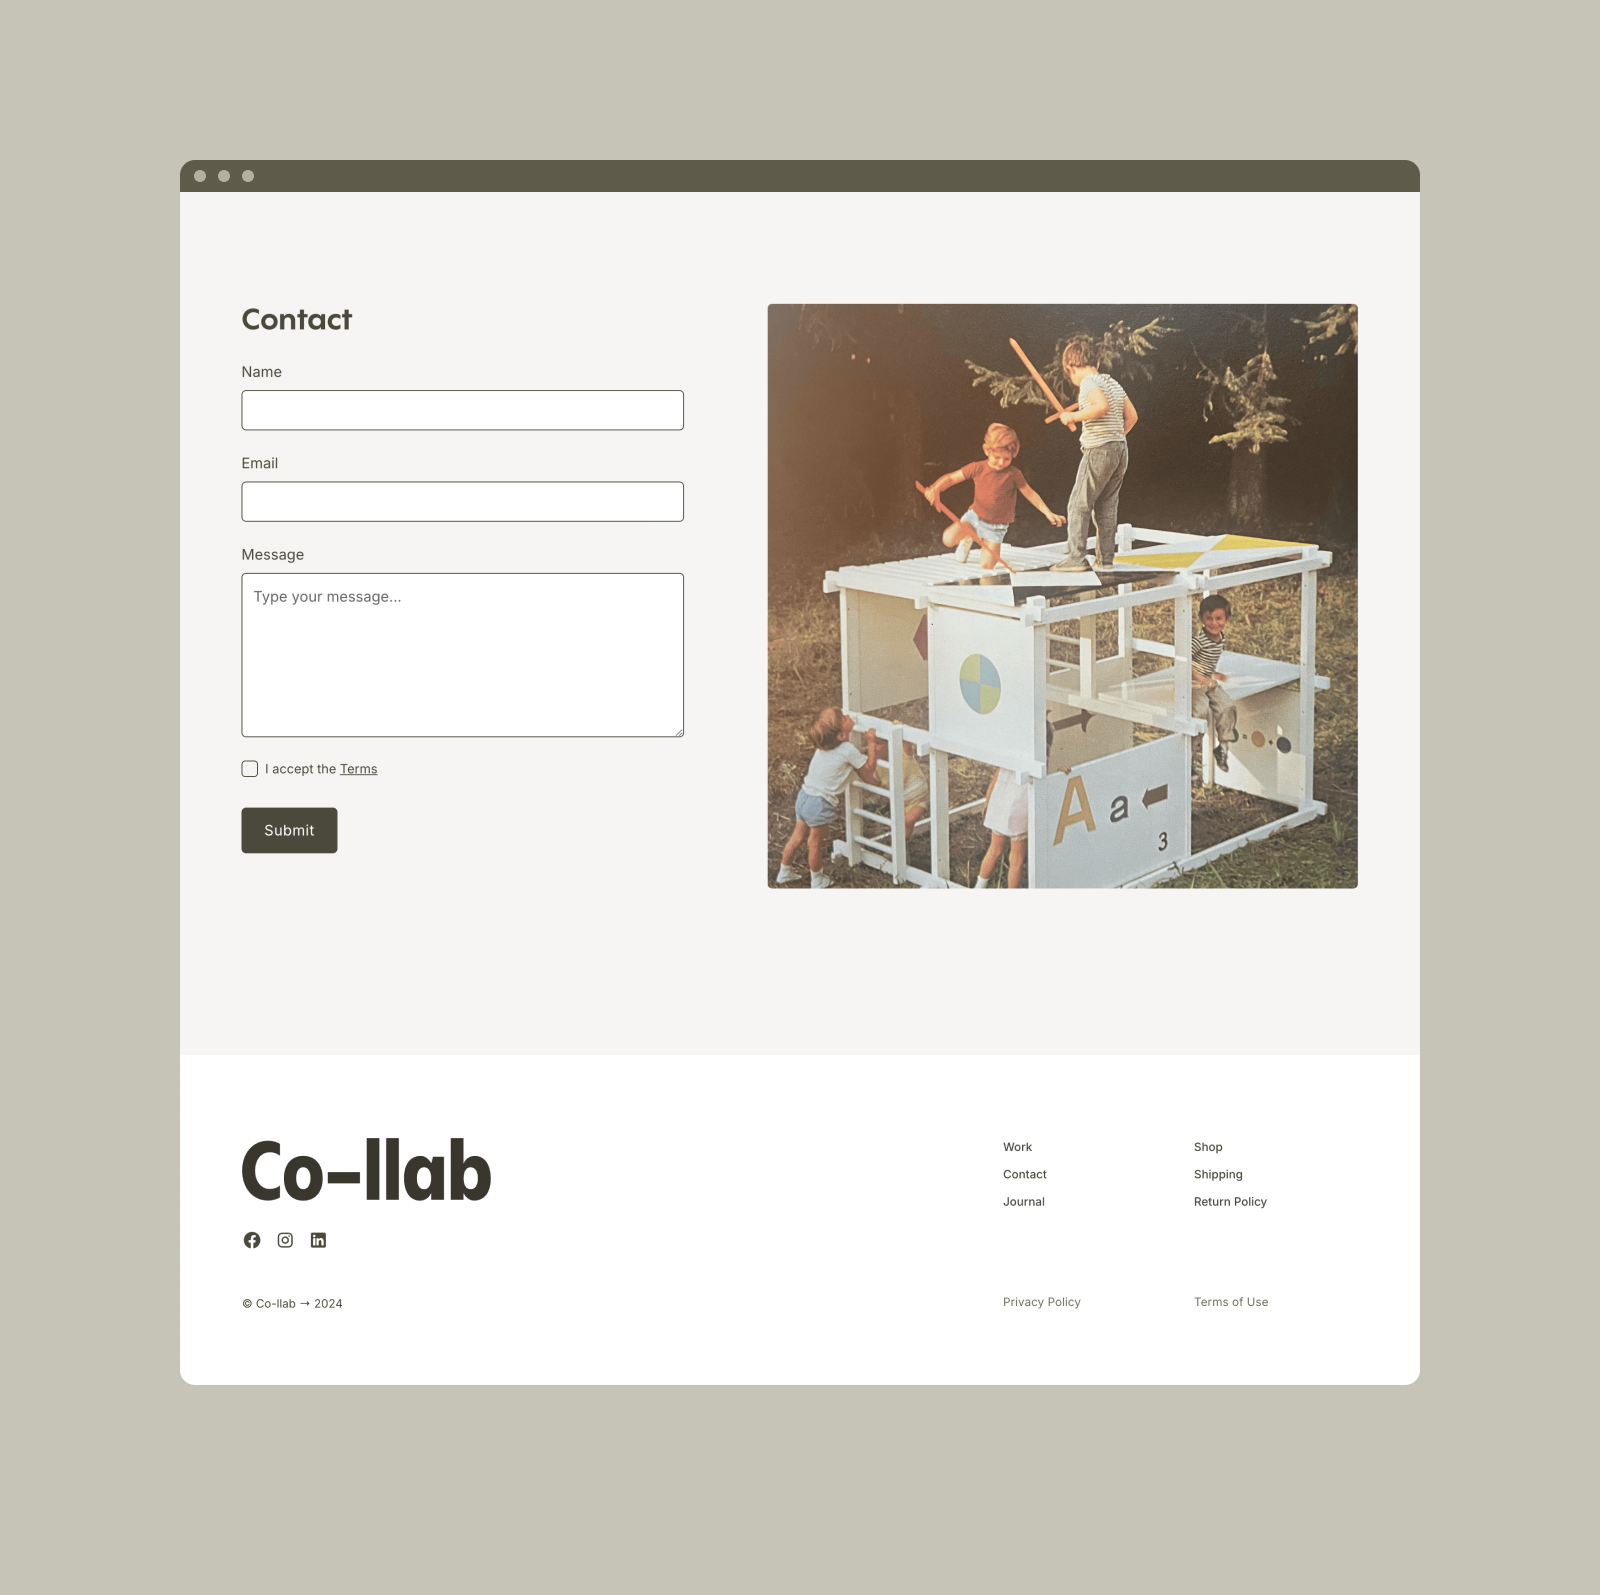
I used the Relume Library to build the site map and generate wireframes. After a few iterations and final adjustments, I moved on to Webflow, where I imported the wireframes to customise, style, ensure responsiveness, and check accessibility before publishing it to the Webflow domain.
Relume is a powerful tool equipped with a Site Builder and a Webflow Library of components. Powered by AI, it enables quick generation of site maps and selection of prebuilt wireframes, which can then be copied and customised in Webflow. It enables rapid website development, speeding up the design process while maintaining flexibility in customisation.
I began by giving the AI a description of the website I planned to build. The AI generated a sitemap, which I could then modify manually or refine further with more detailed prompts. Once I was happy with the structure, I moved on to generating wireframes.
What’s great is that even if you decide to add more elements or realise a component doesn’t fit, you can easily replace it later in Webflow. Thanks to Relume’s Chrome extension, the classes in newly imported wireframes are updated and synced with existing ones, ensuring smooth integration even after styling.
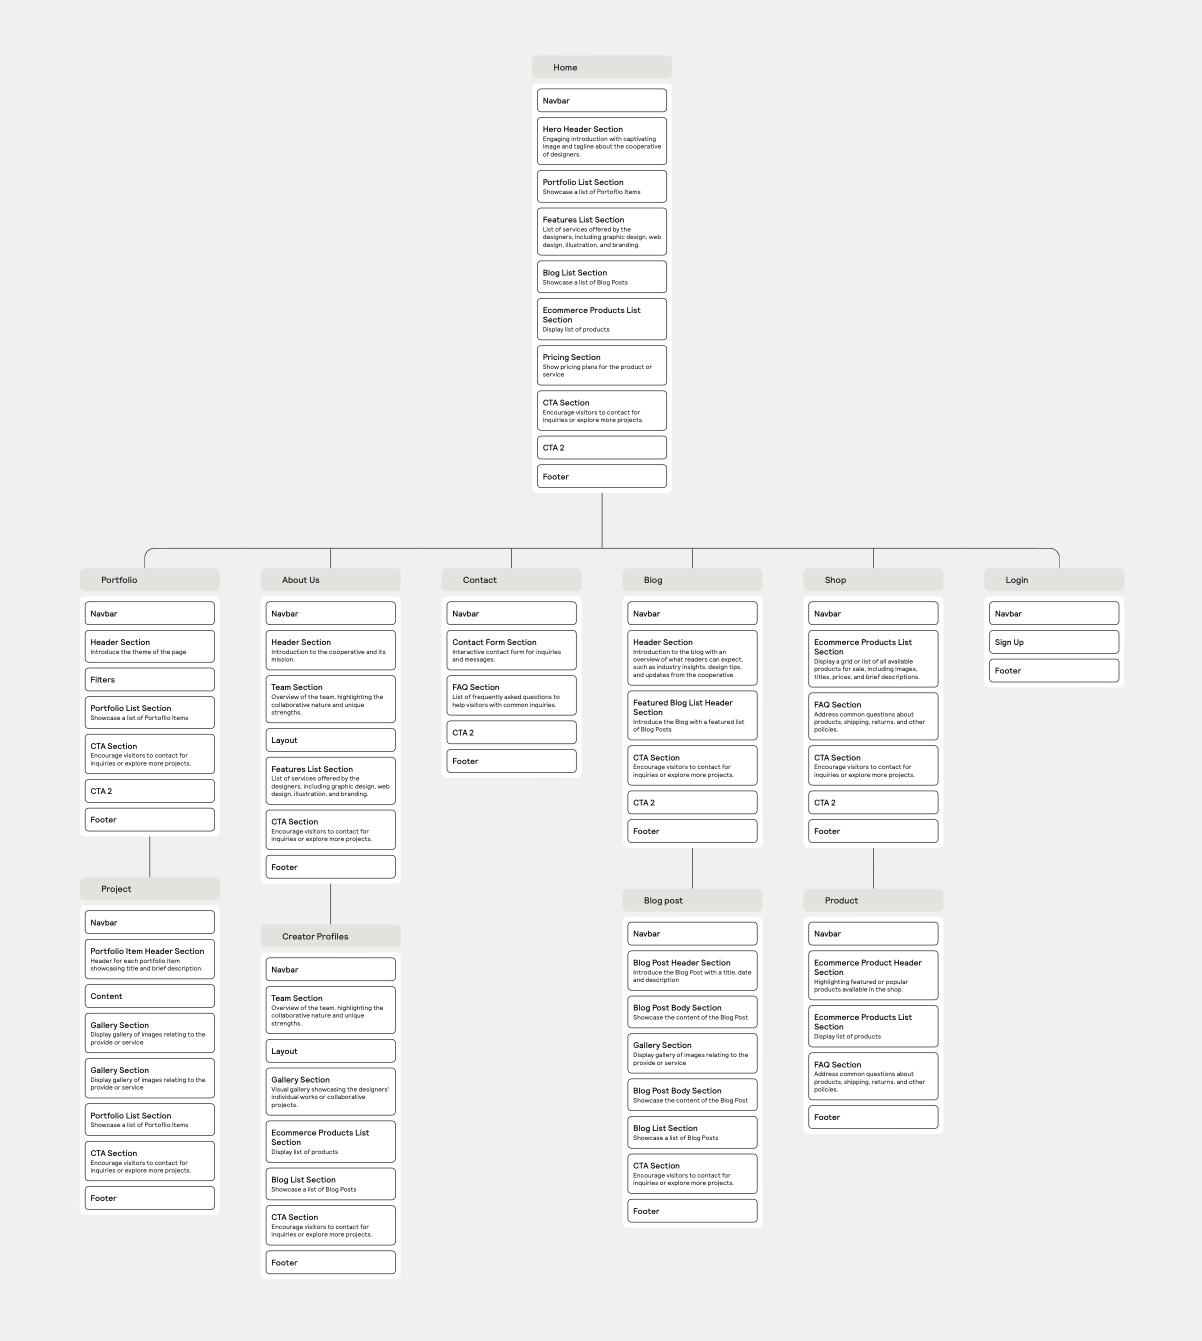
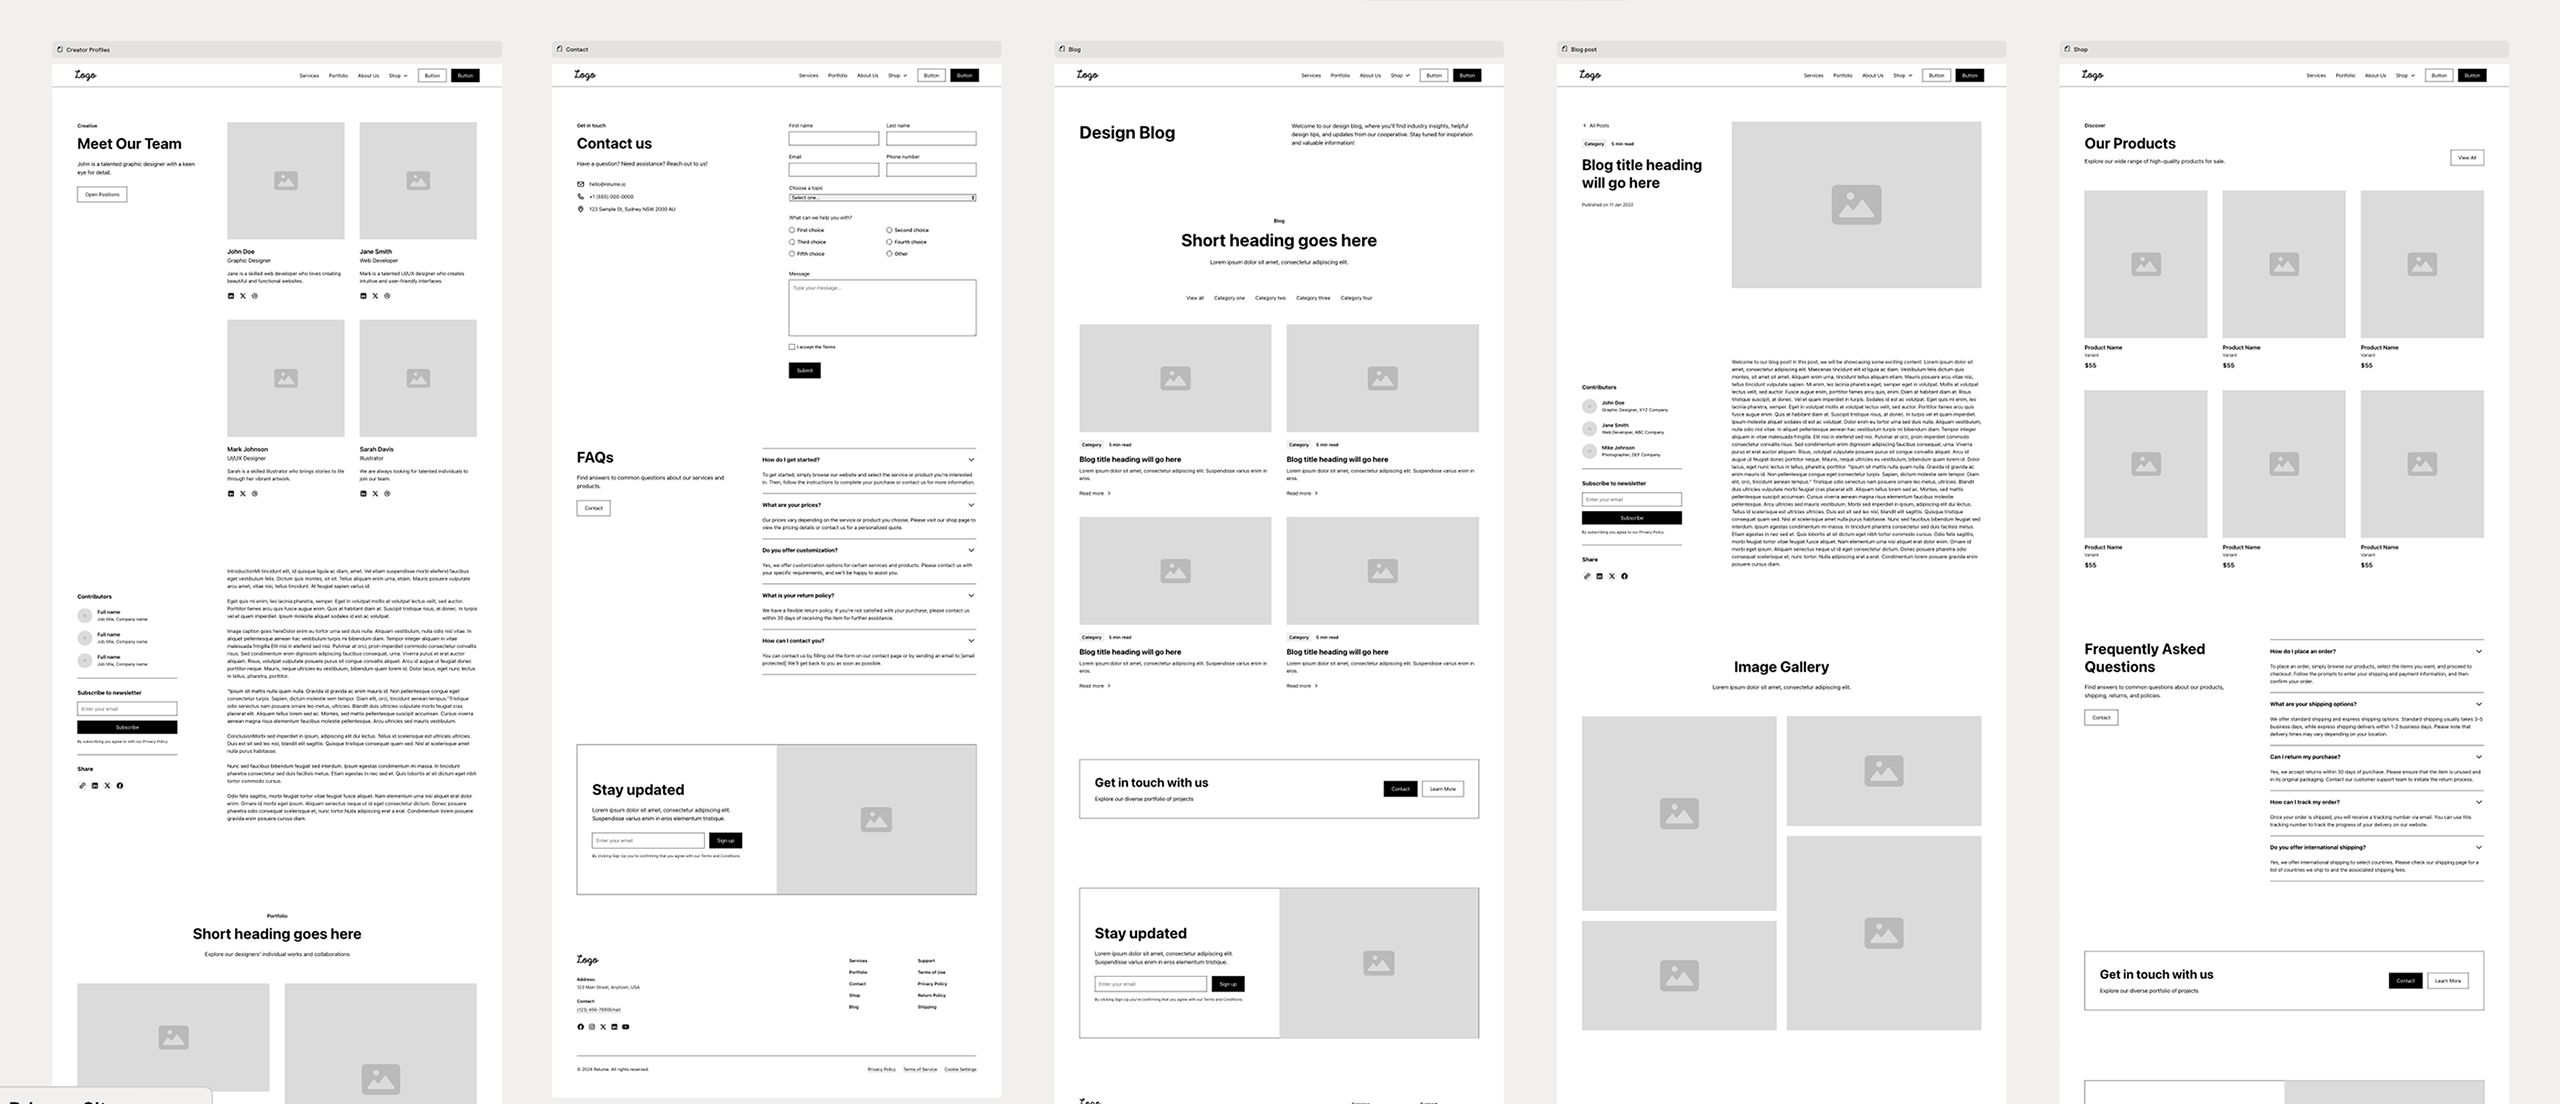
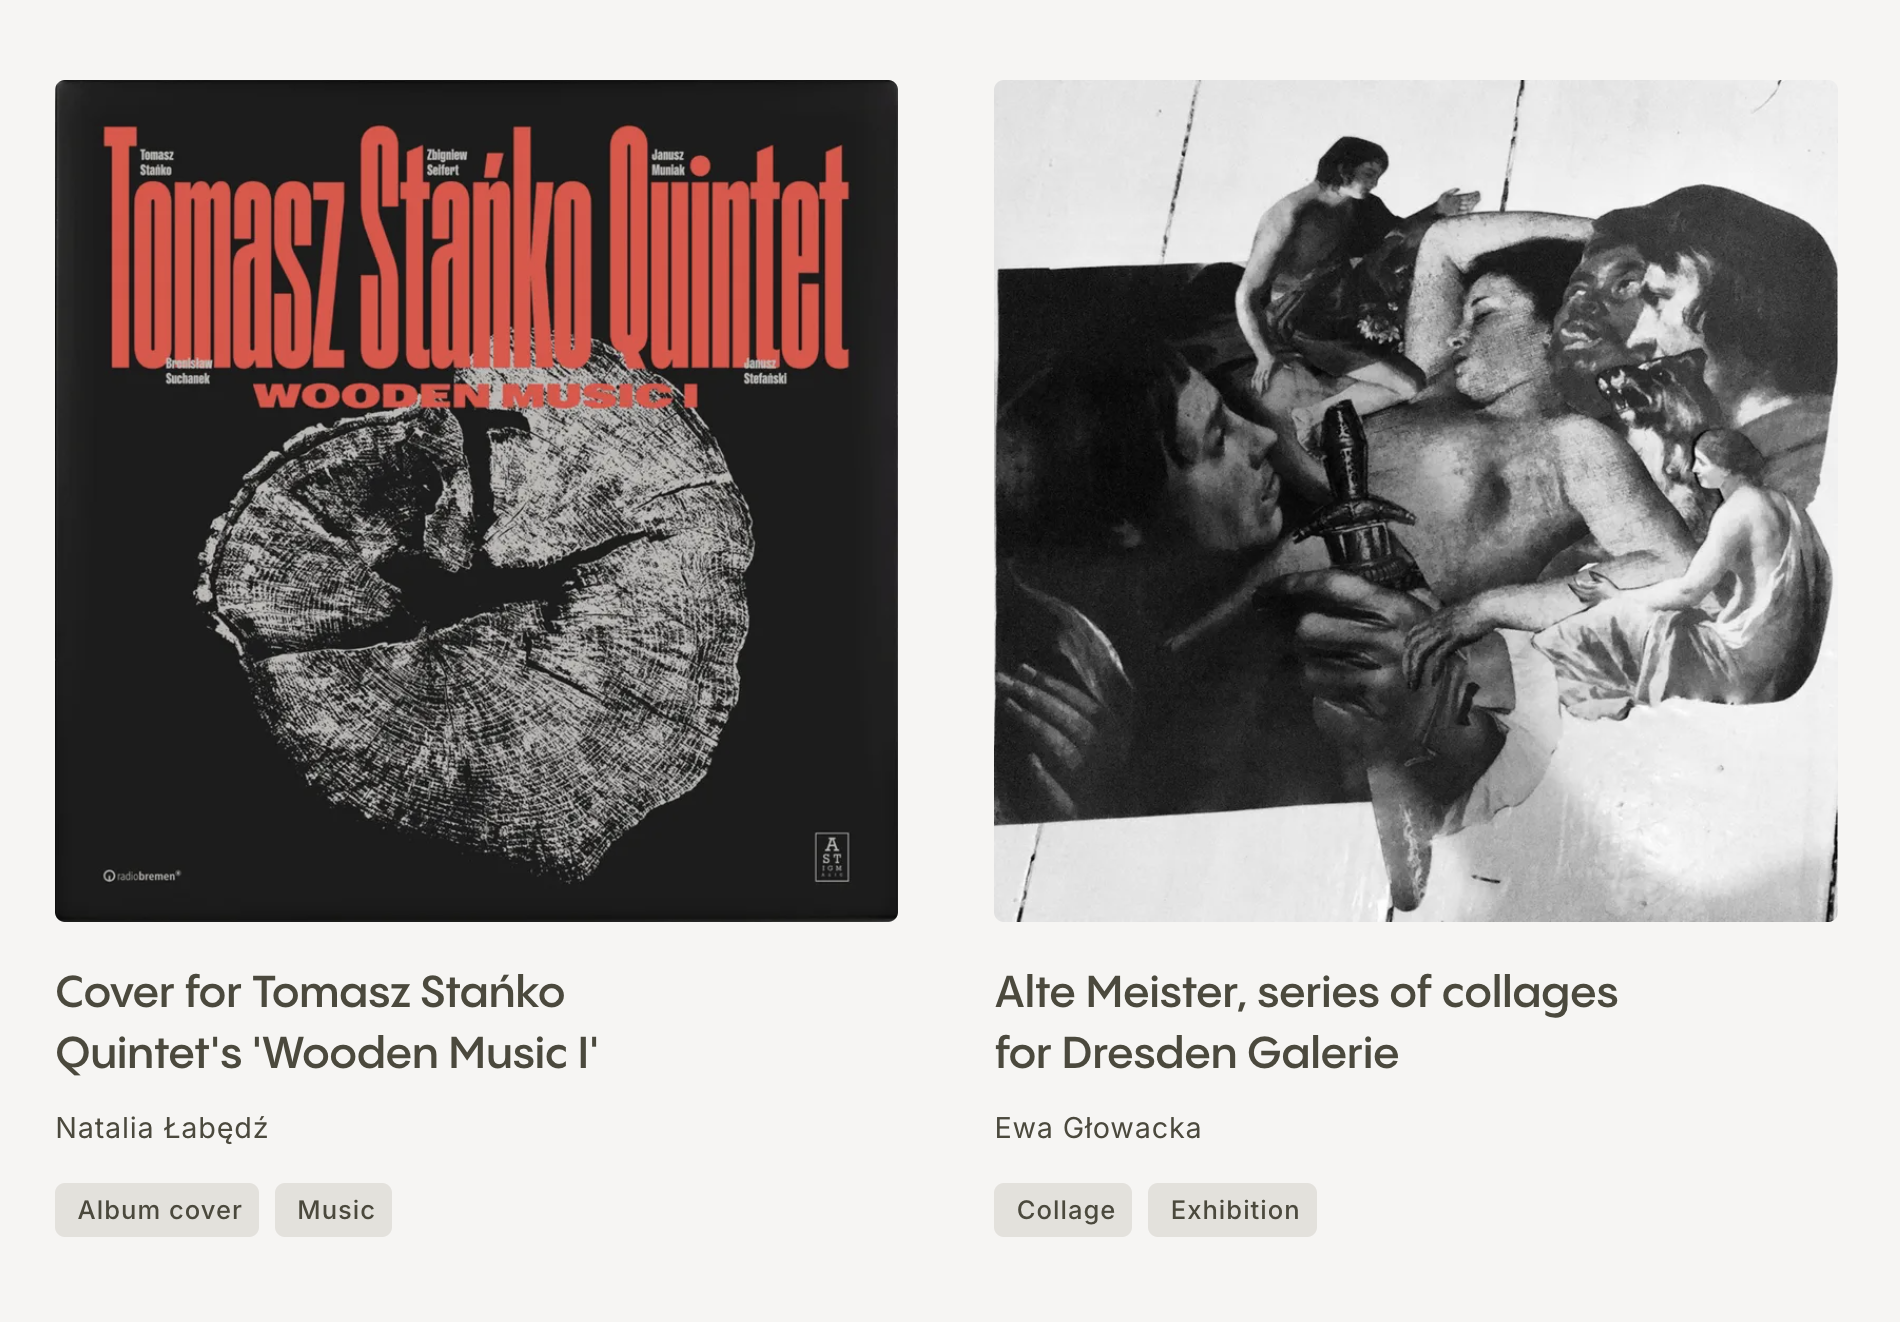
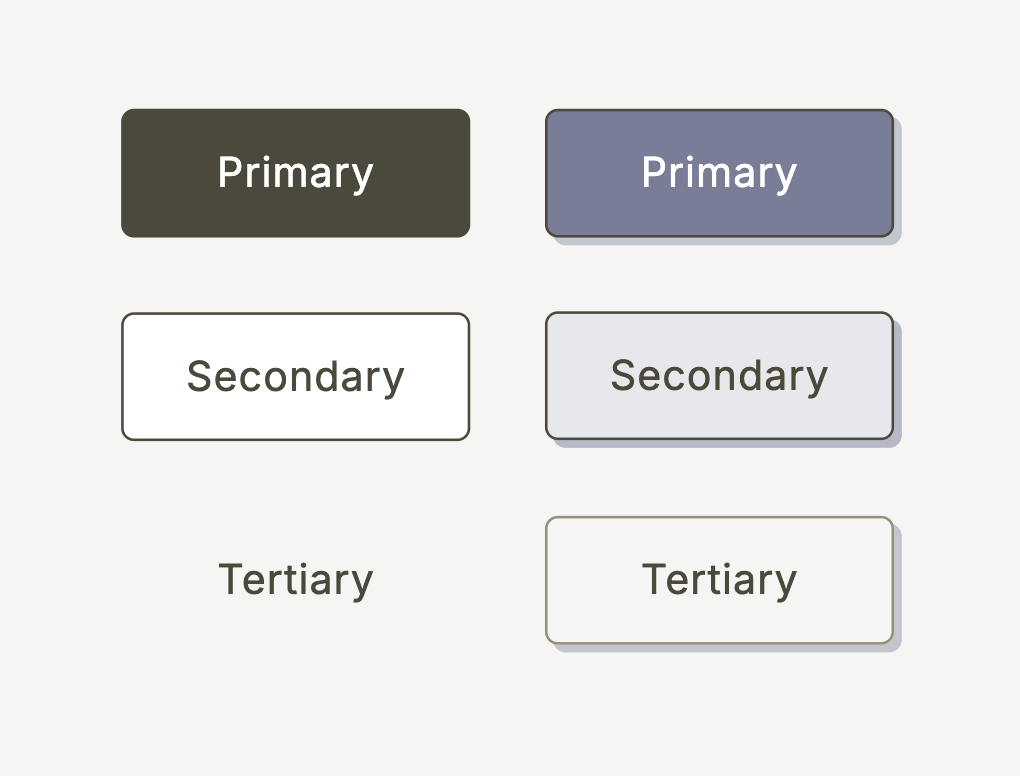
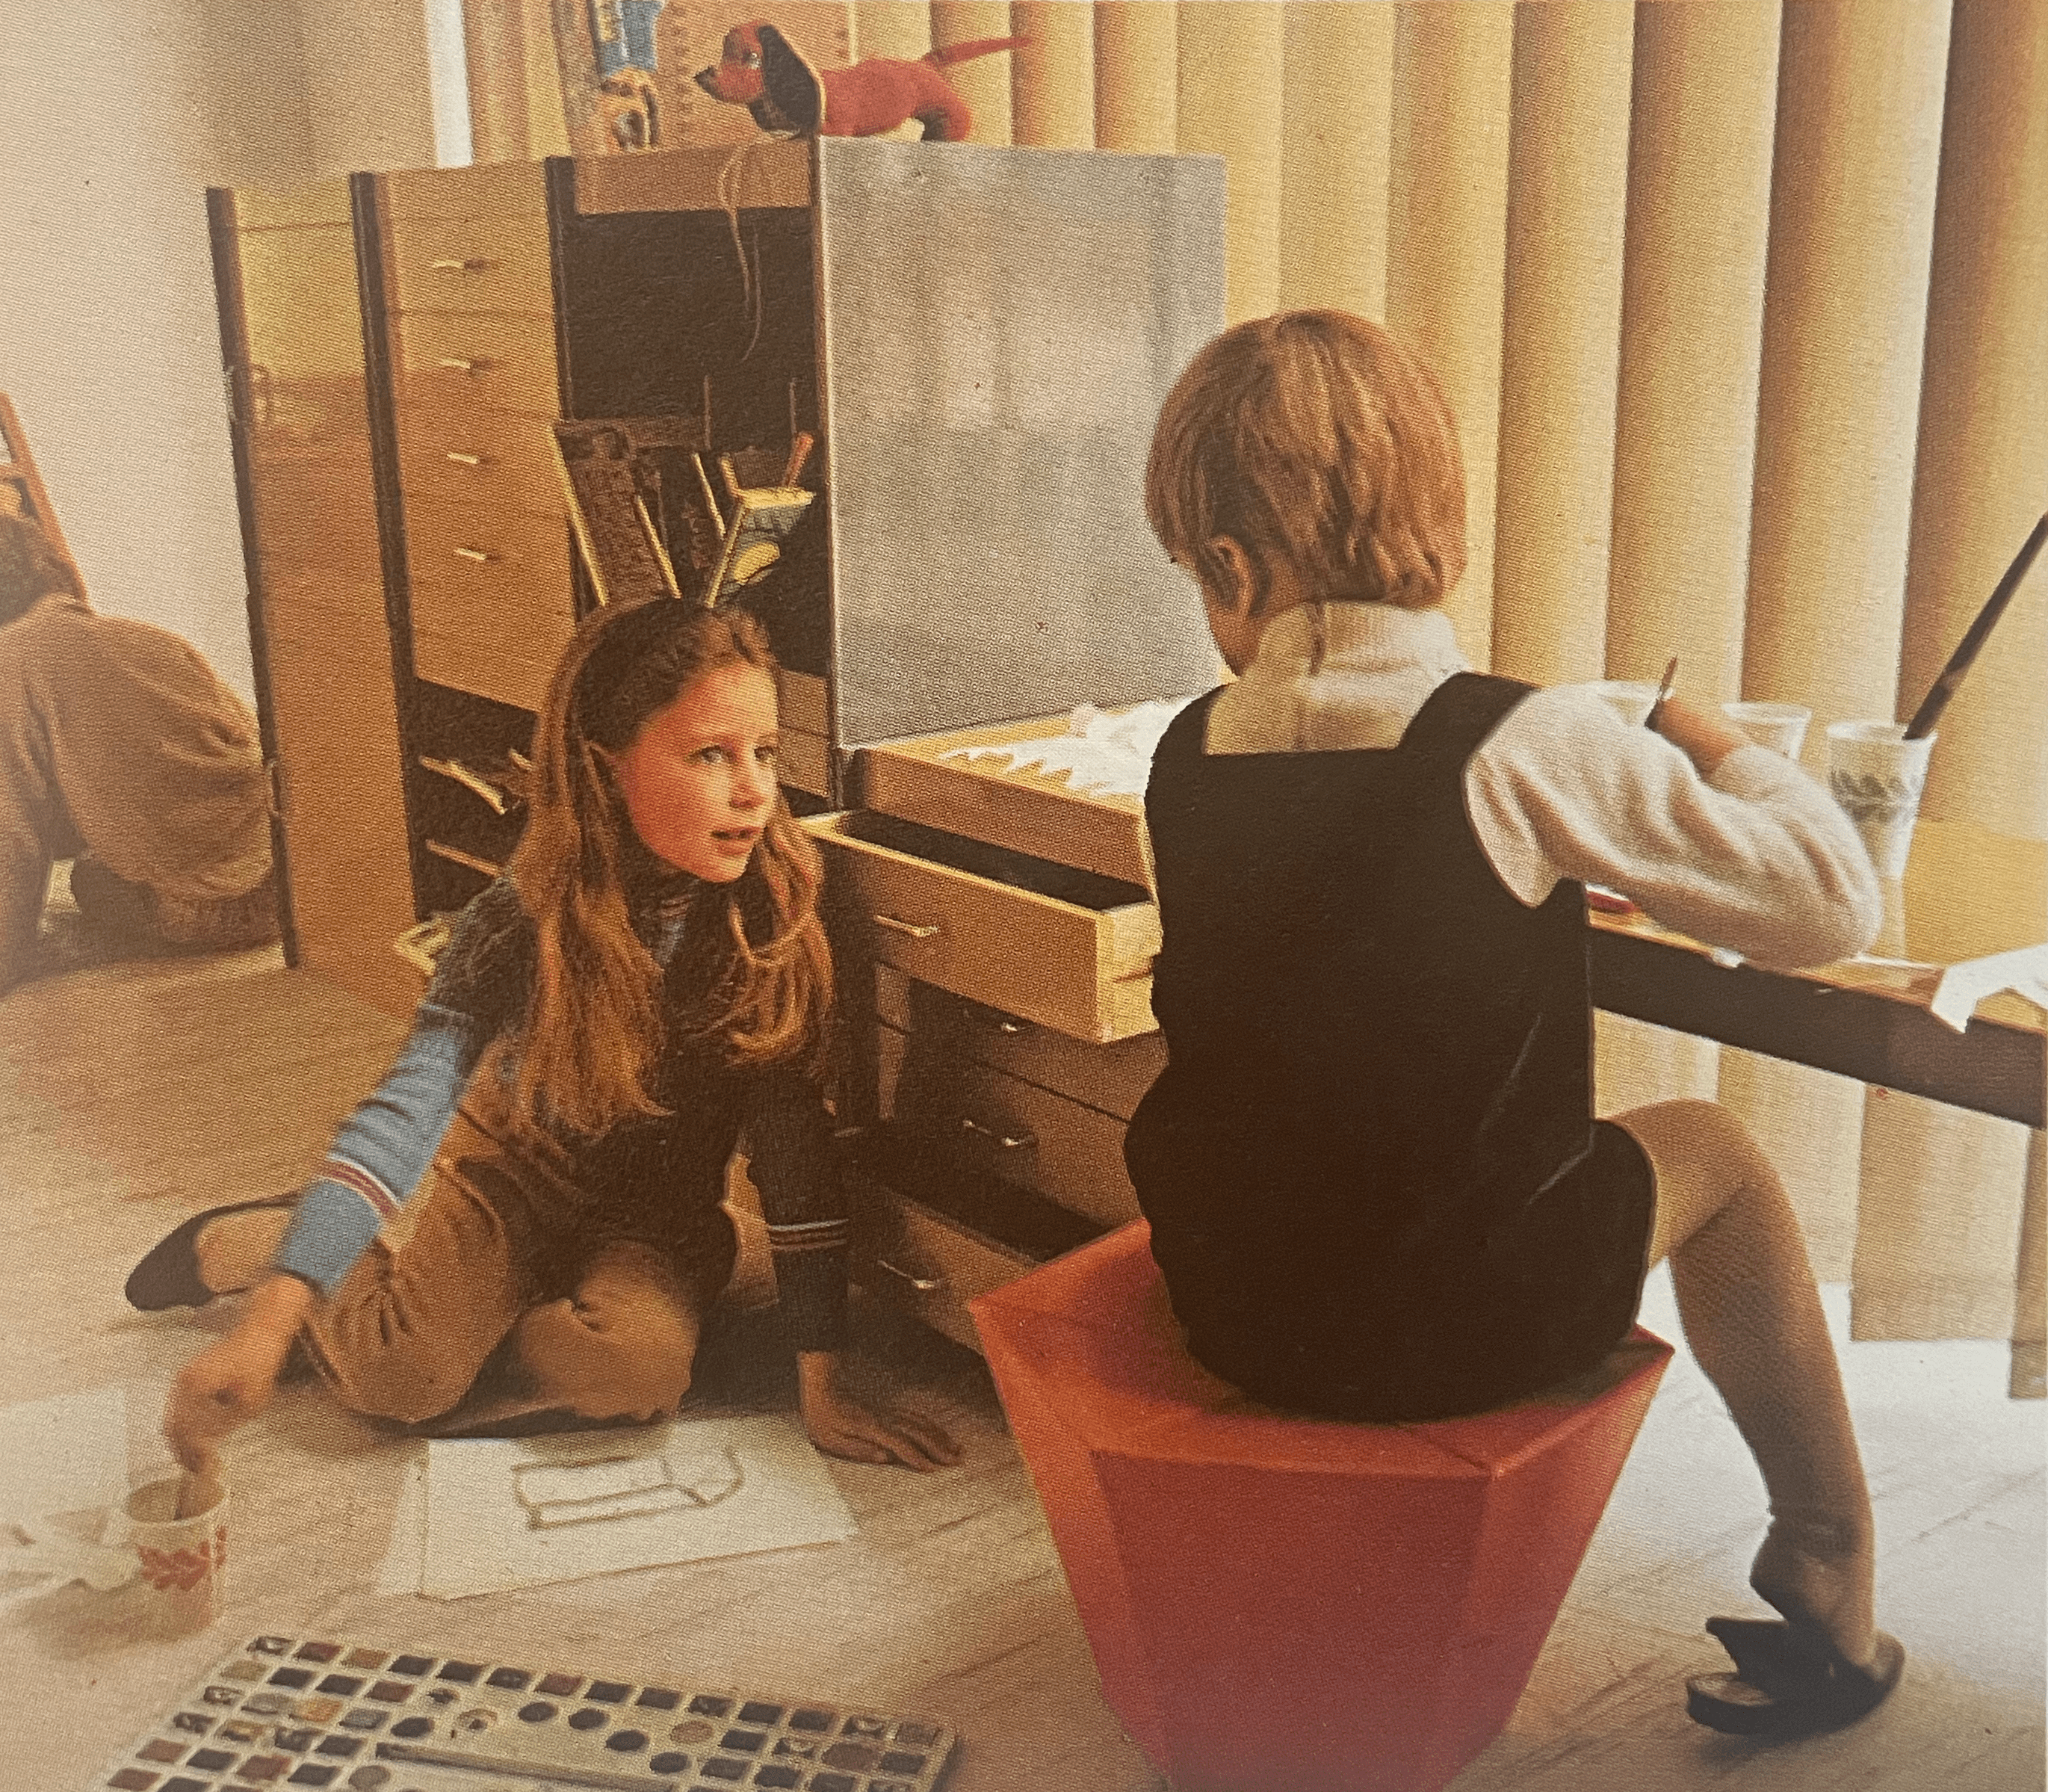
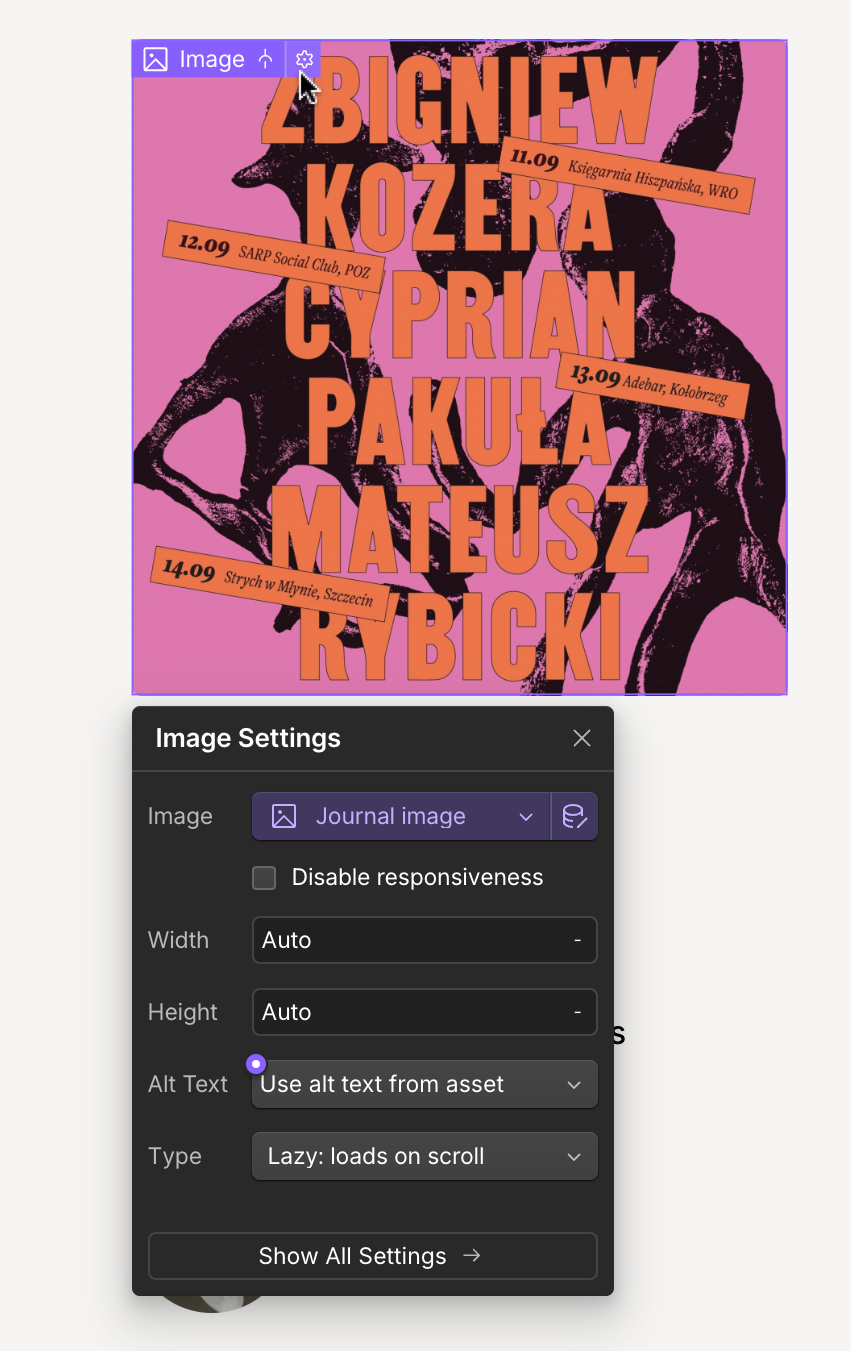
In Webflow, I began by building a static, responsive website. After making a few adjustments to the component structure, I moved on to styling the project. The goal was to create a clear and minimal design, allowing the designers' artwork to take centre stage. To keep the focus on the work, I opted for a muted colour palette. The vintage images used in the project were meant to evoke a sense of collaboration and childlike playfulness.
I ensured the website was fully responsive and accessible, checked for errors, and then published the homepage to the Webflow domain.


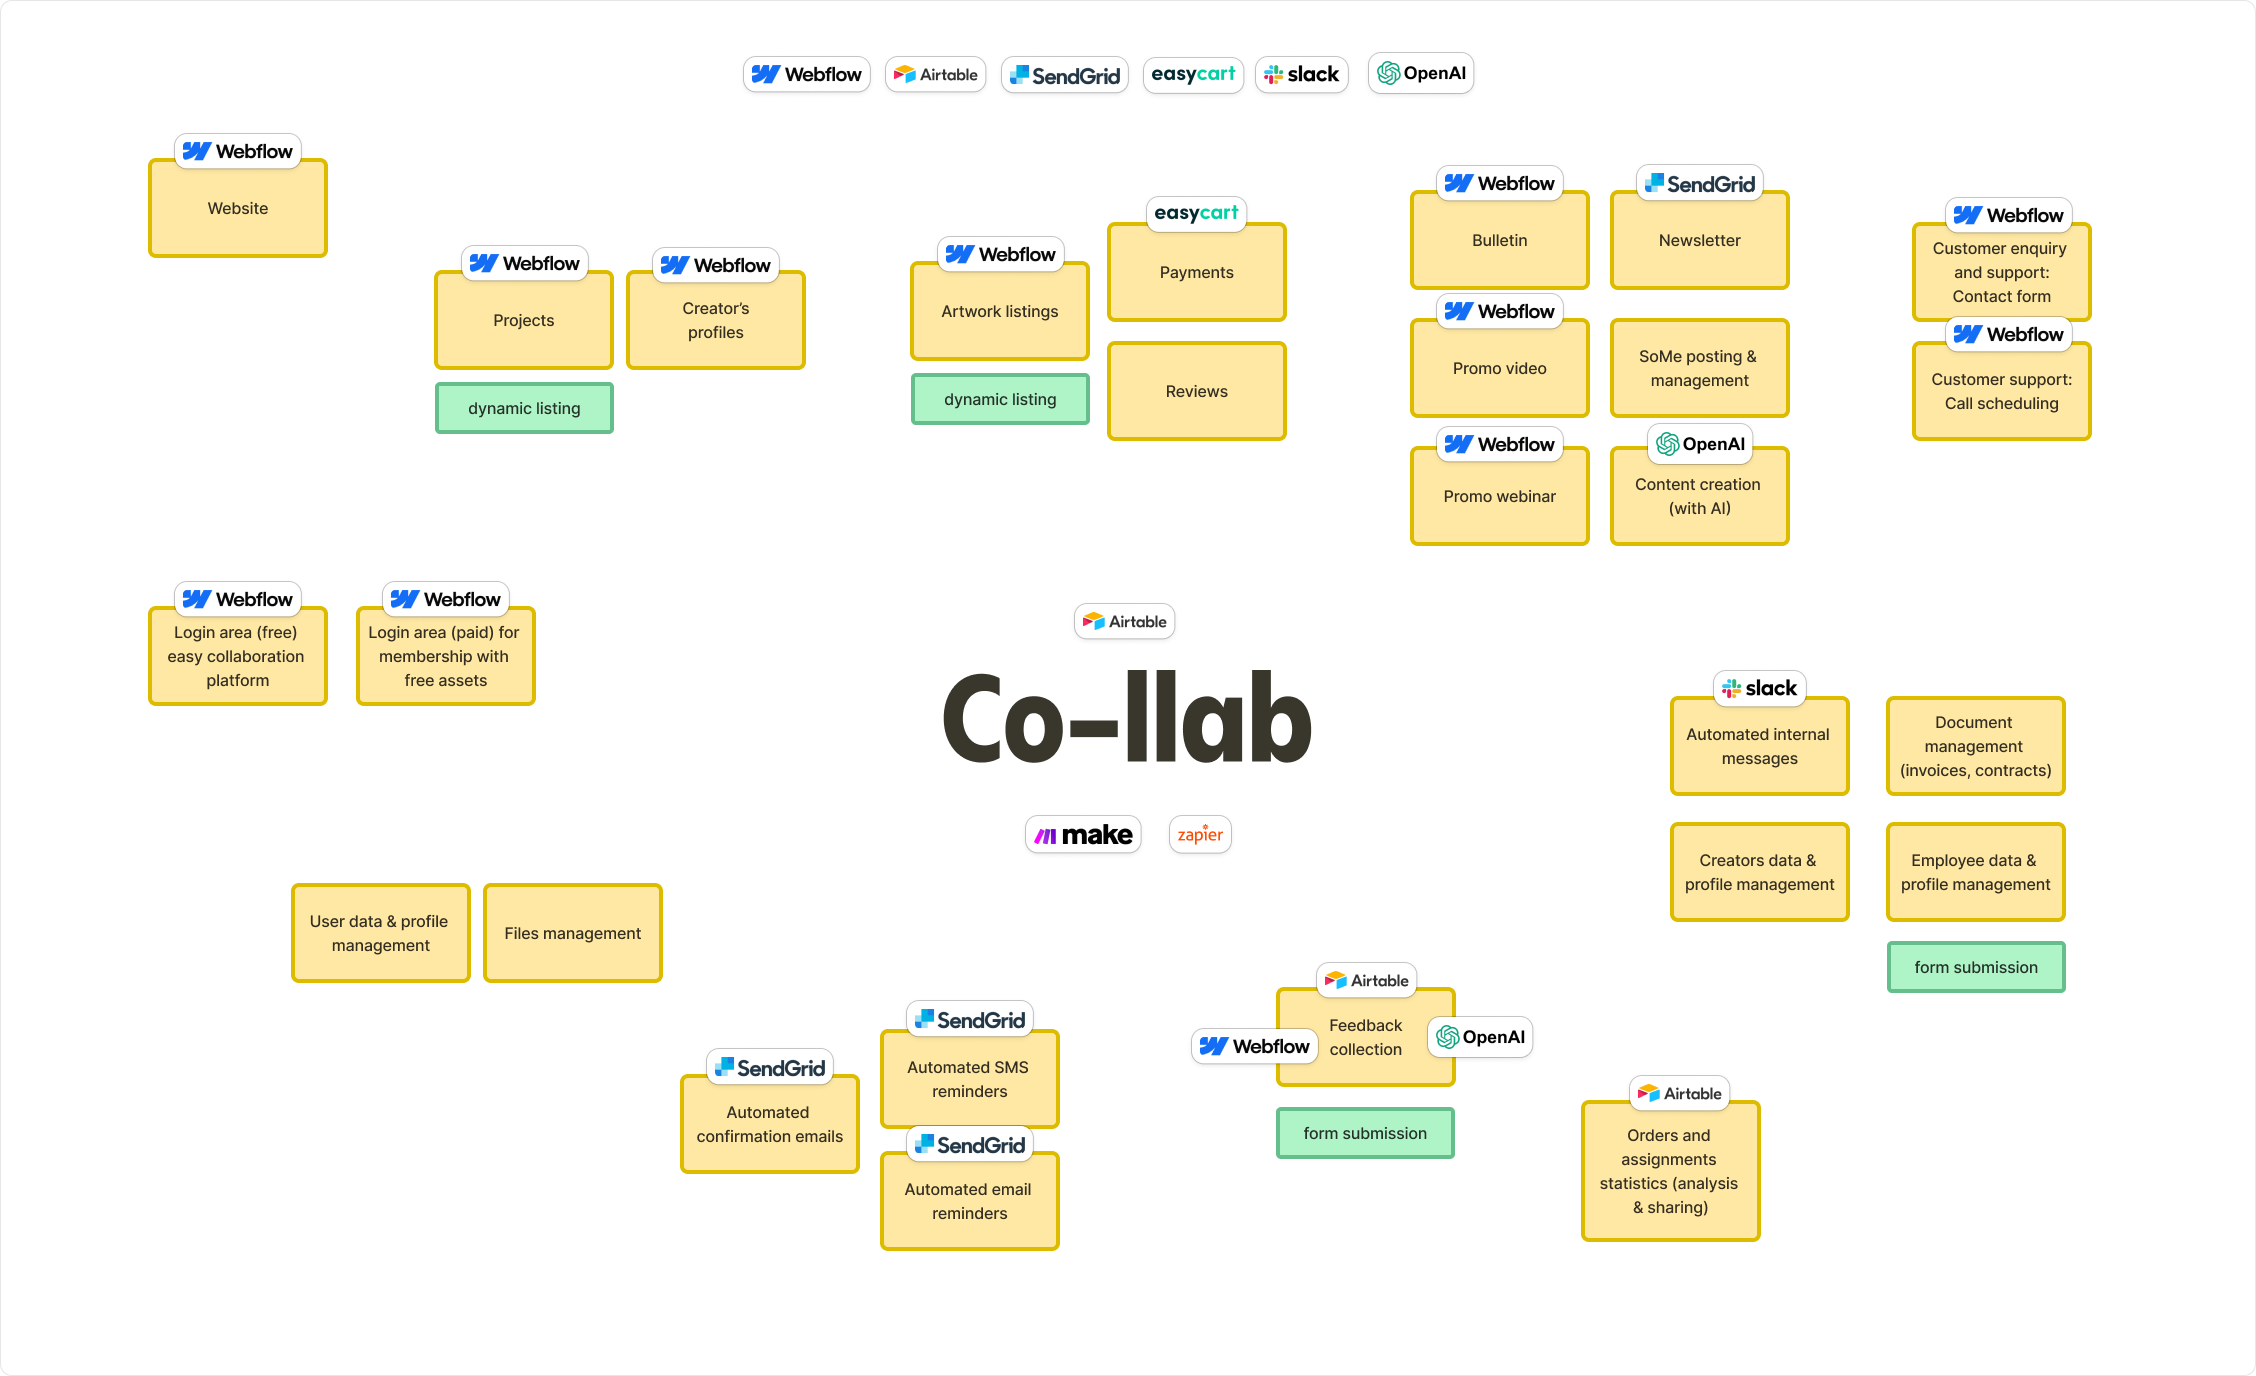
Airtable as a base for automation
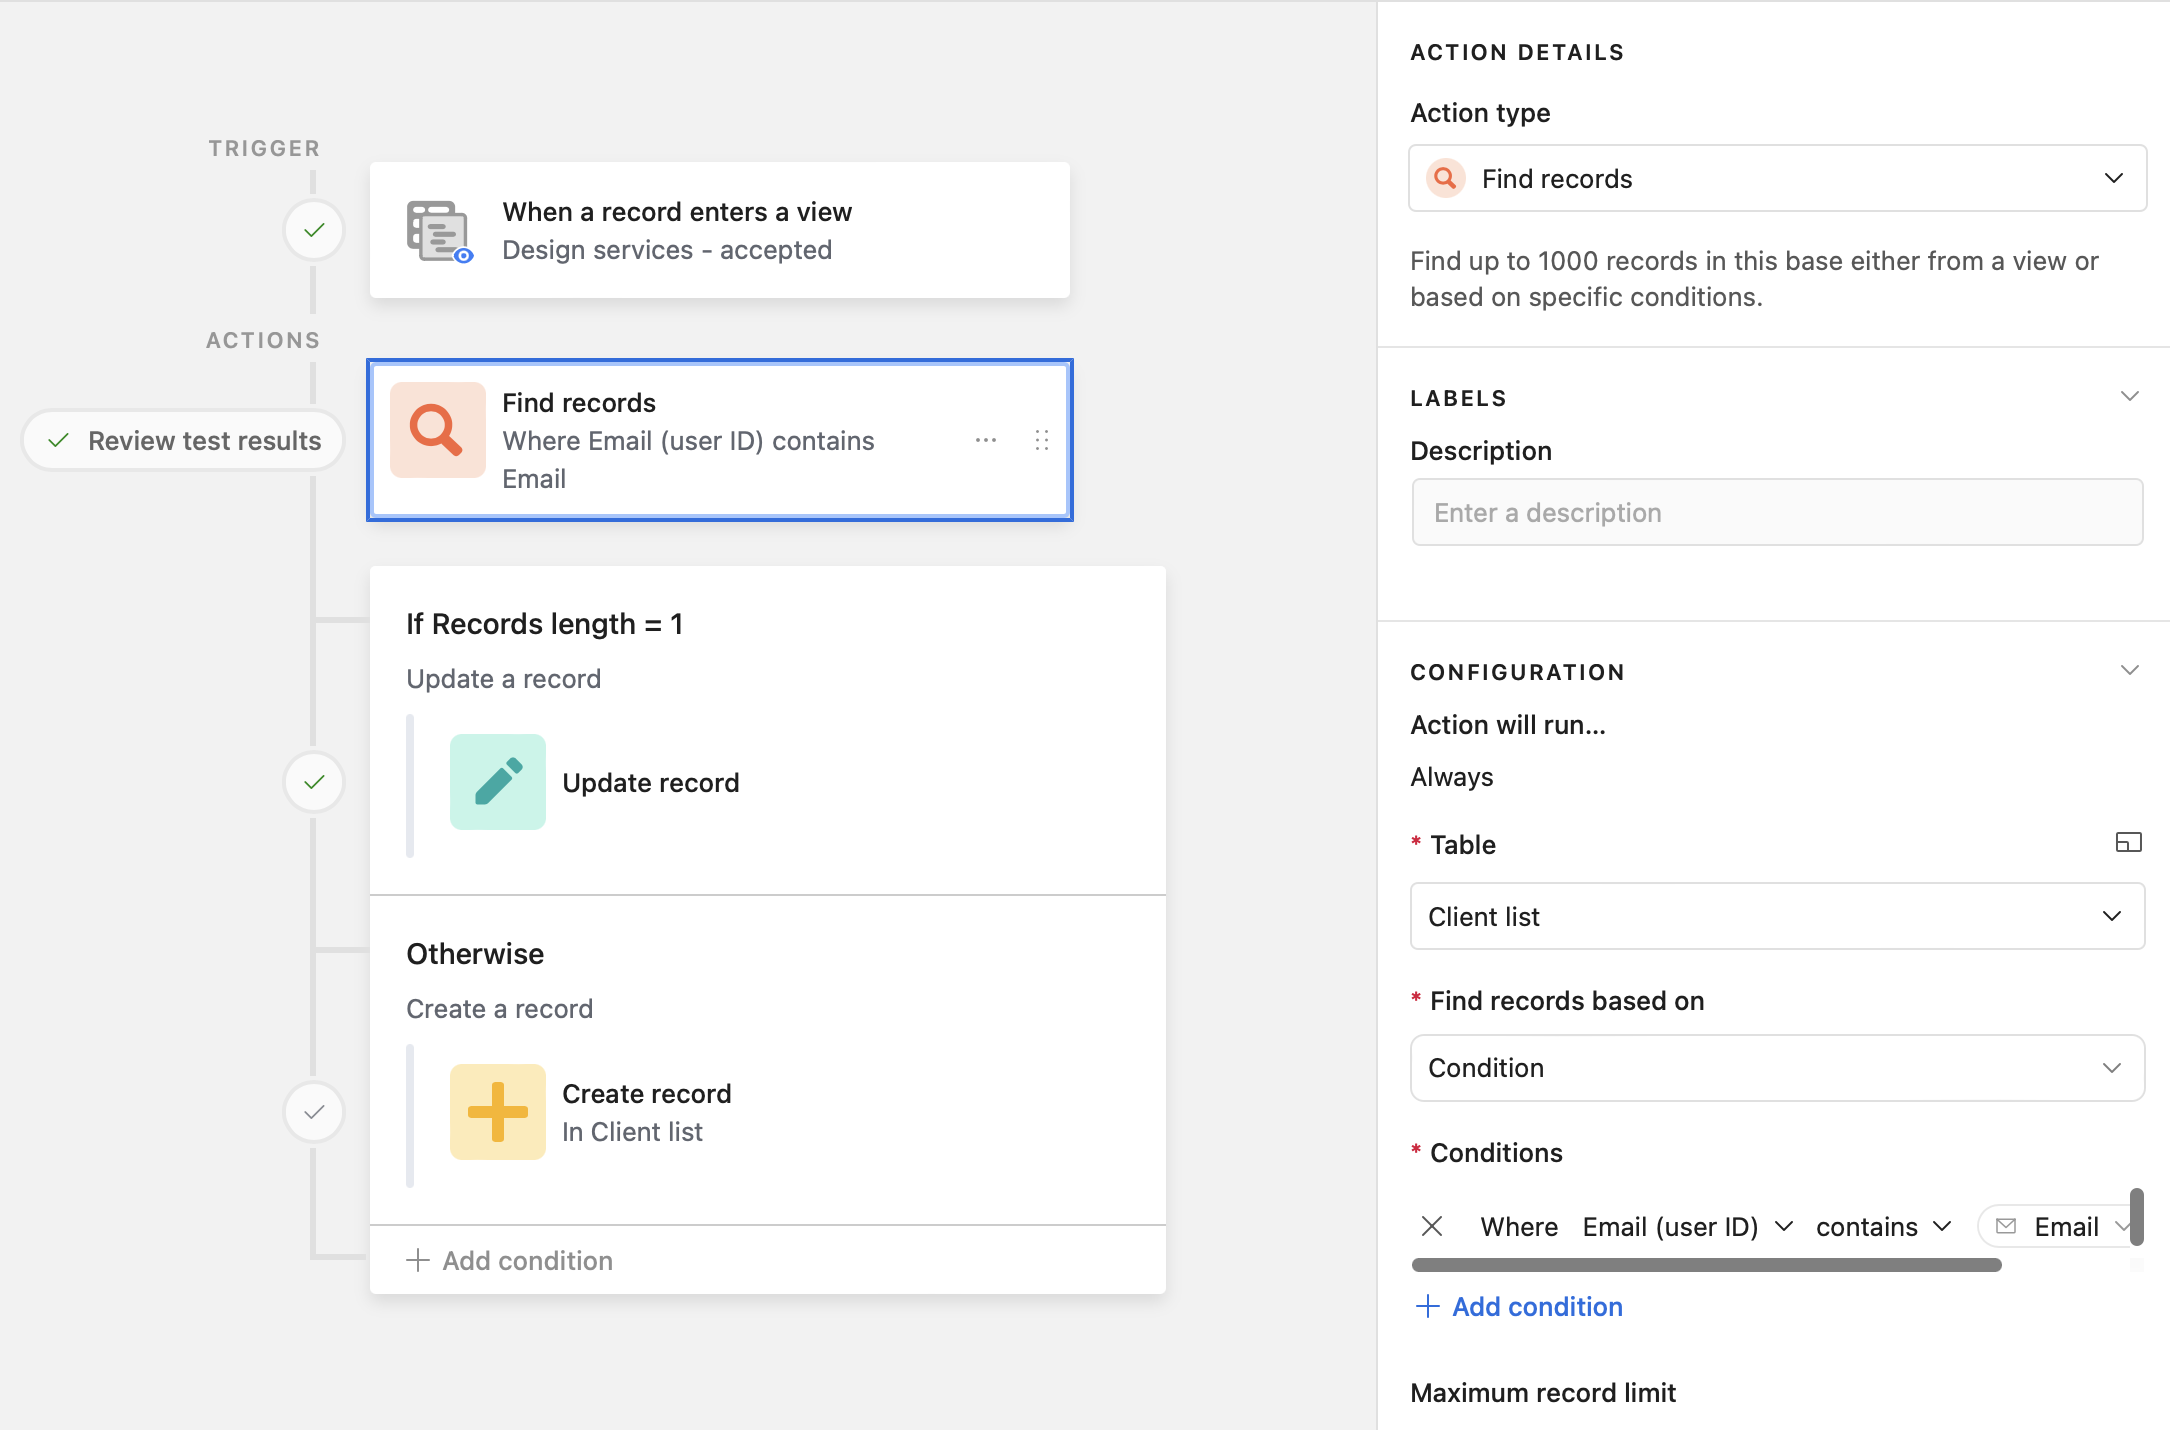
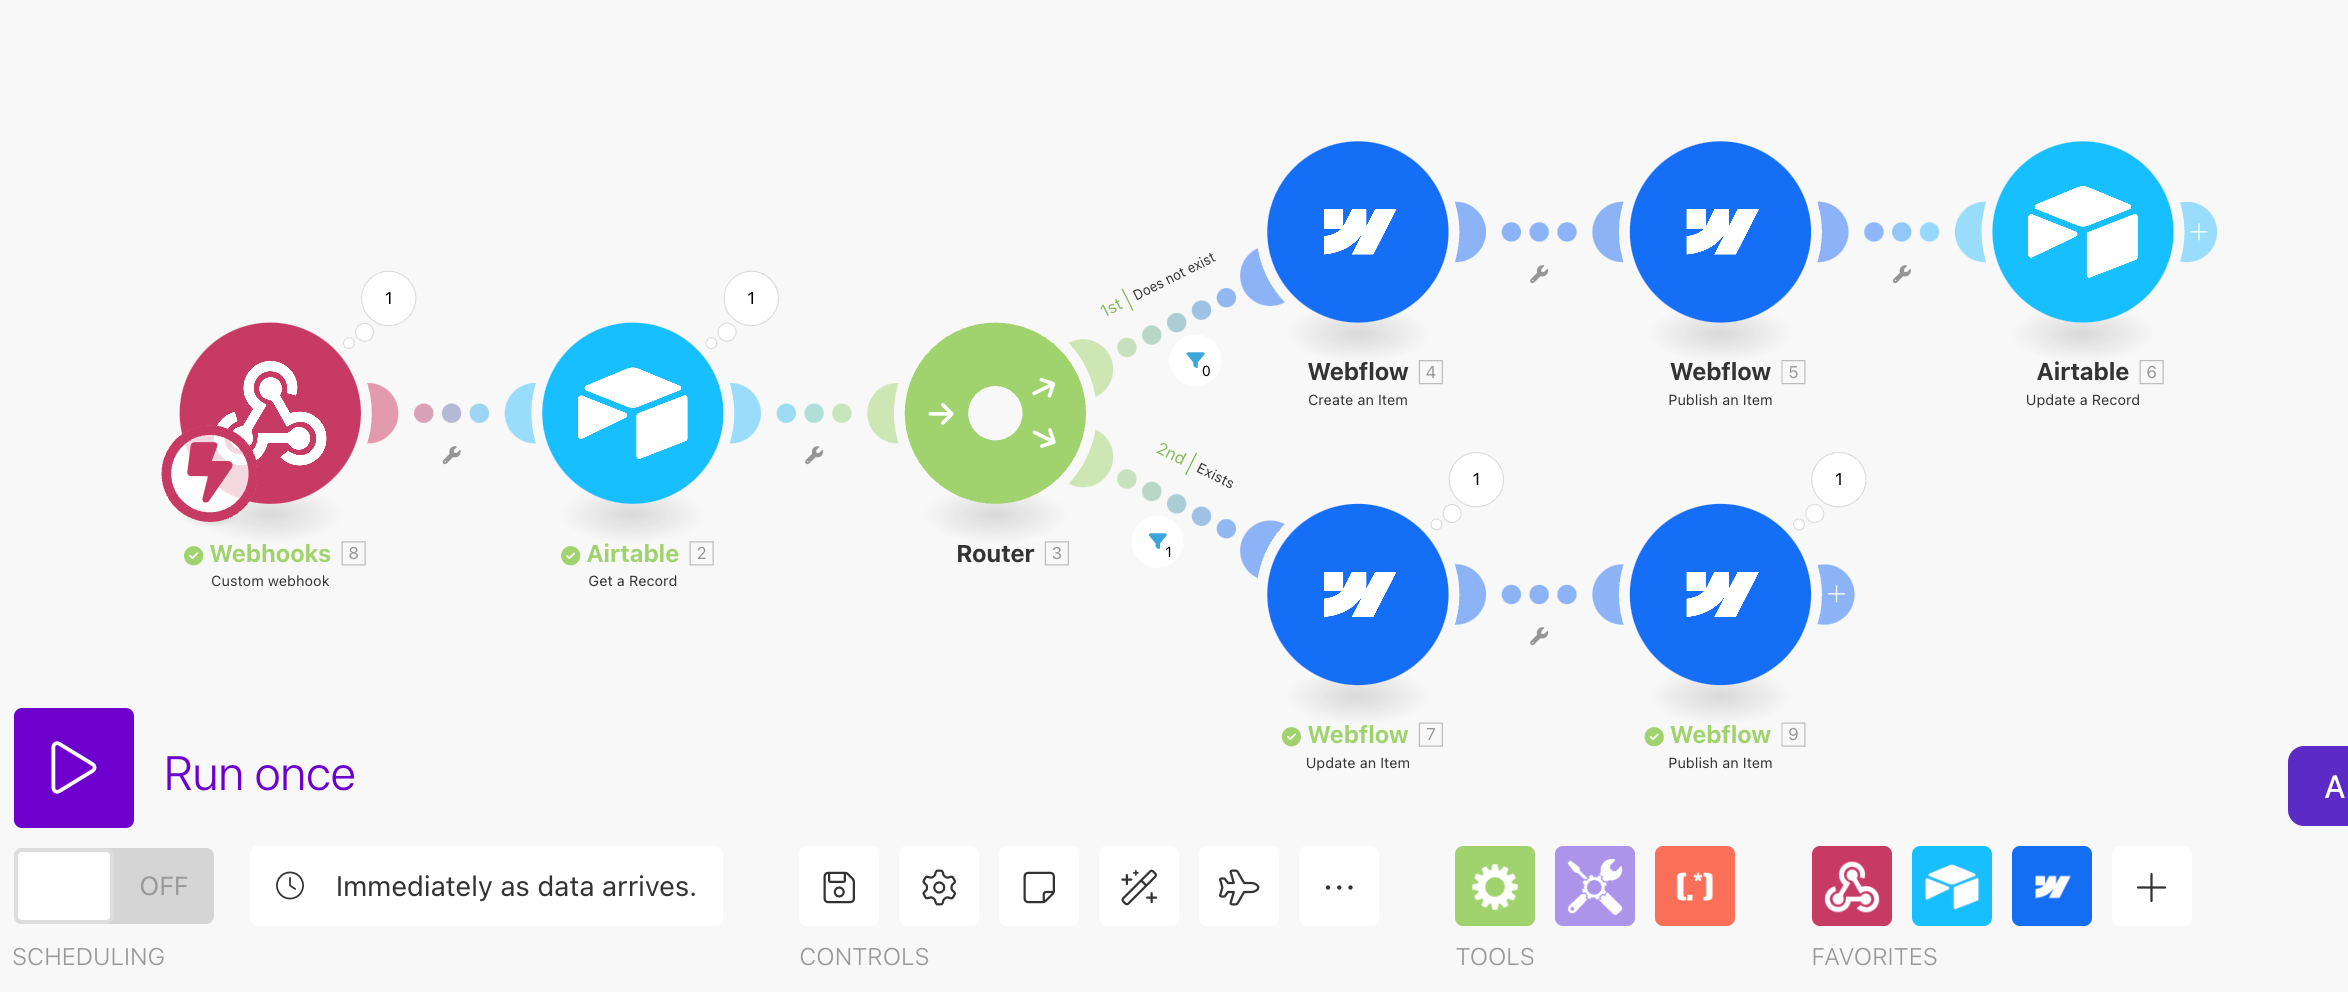
The next phase of the project focused on downscaling that initial burst of creativity. I selected one essential functionality to build upon and expand the project gradually. I set up an Airtable table to capture data from contact form submissions, triggering different workflows based on user input.
A big focus was automating communication—both with clients and internally. From custom emails confirming form submissions to internal Slack messaging notifying the team of the new form being submitted.
Since Airtable doesn’t allow for styled email automation, this is where Make came in. It enabled me to trigger automations from Airtable and connect them to platforms like MailerLite, where we could send custom-branded emails with dynamic content.

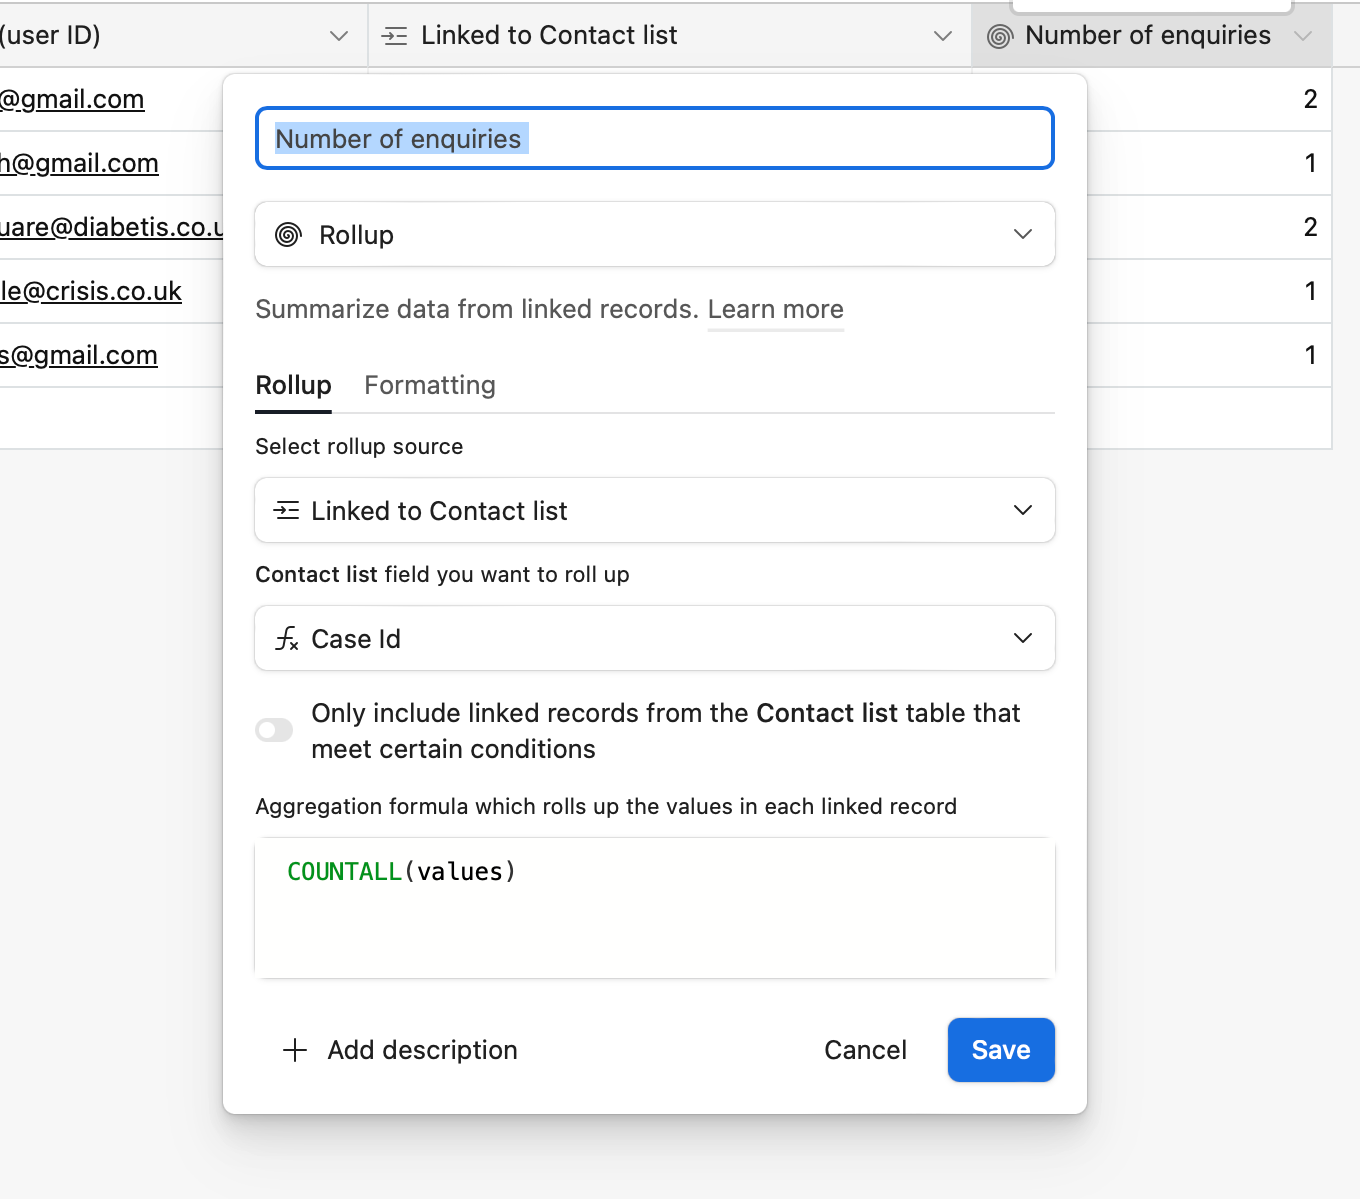
Managing client data was another key aspect. I configured Airtable to recognise whether a client, identified by their email, was already in our database. If they were, their record would be updated; if not, a new profile would be created automatically. From there, all submissions made by that person would be linked to their profile, making it easy to track all their details in one place.
Integrating Webflow with automation
After exploring the magical realm of Airtable as both a database and automation trigger, I moved on to the real meat of the project: setting up CMS collections, creating custom checkouts with Stripe and EasyCart, automating promotion and marketing, AI for content creation... the list goes on. Complicated? It doesn’t have to be.
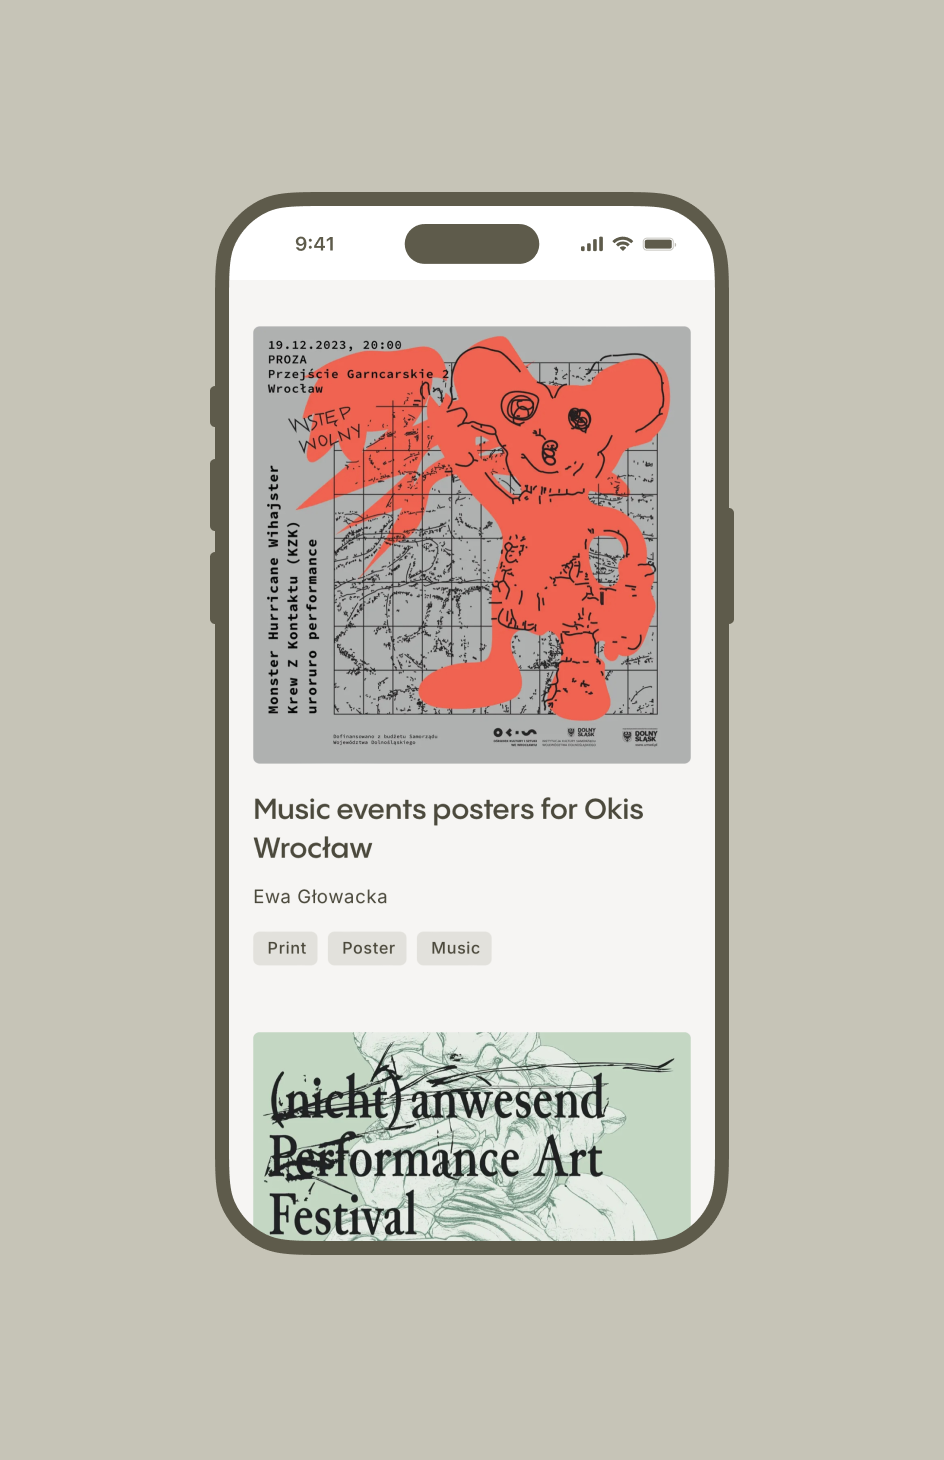
To stick to the “start small” approach, I focused on one section of the website for dynamic content. I set up a CMS collection that included all the elements from my chosen section and then added a CMS list, linking the appropriate items from the collection.
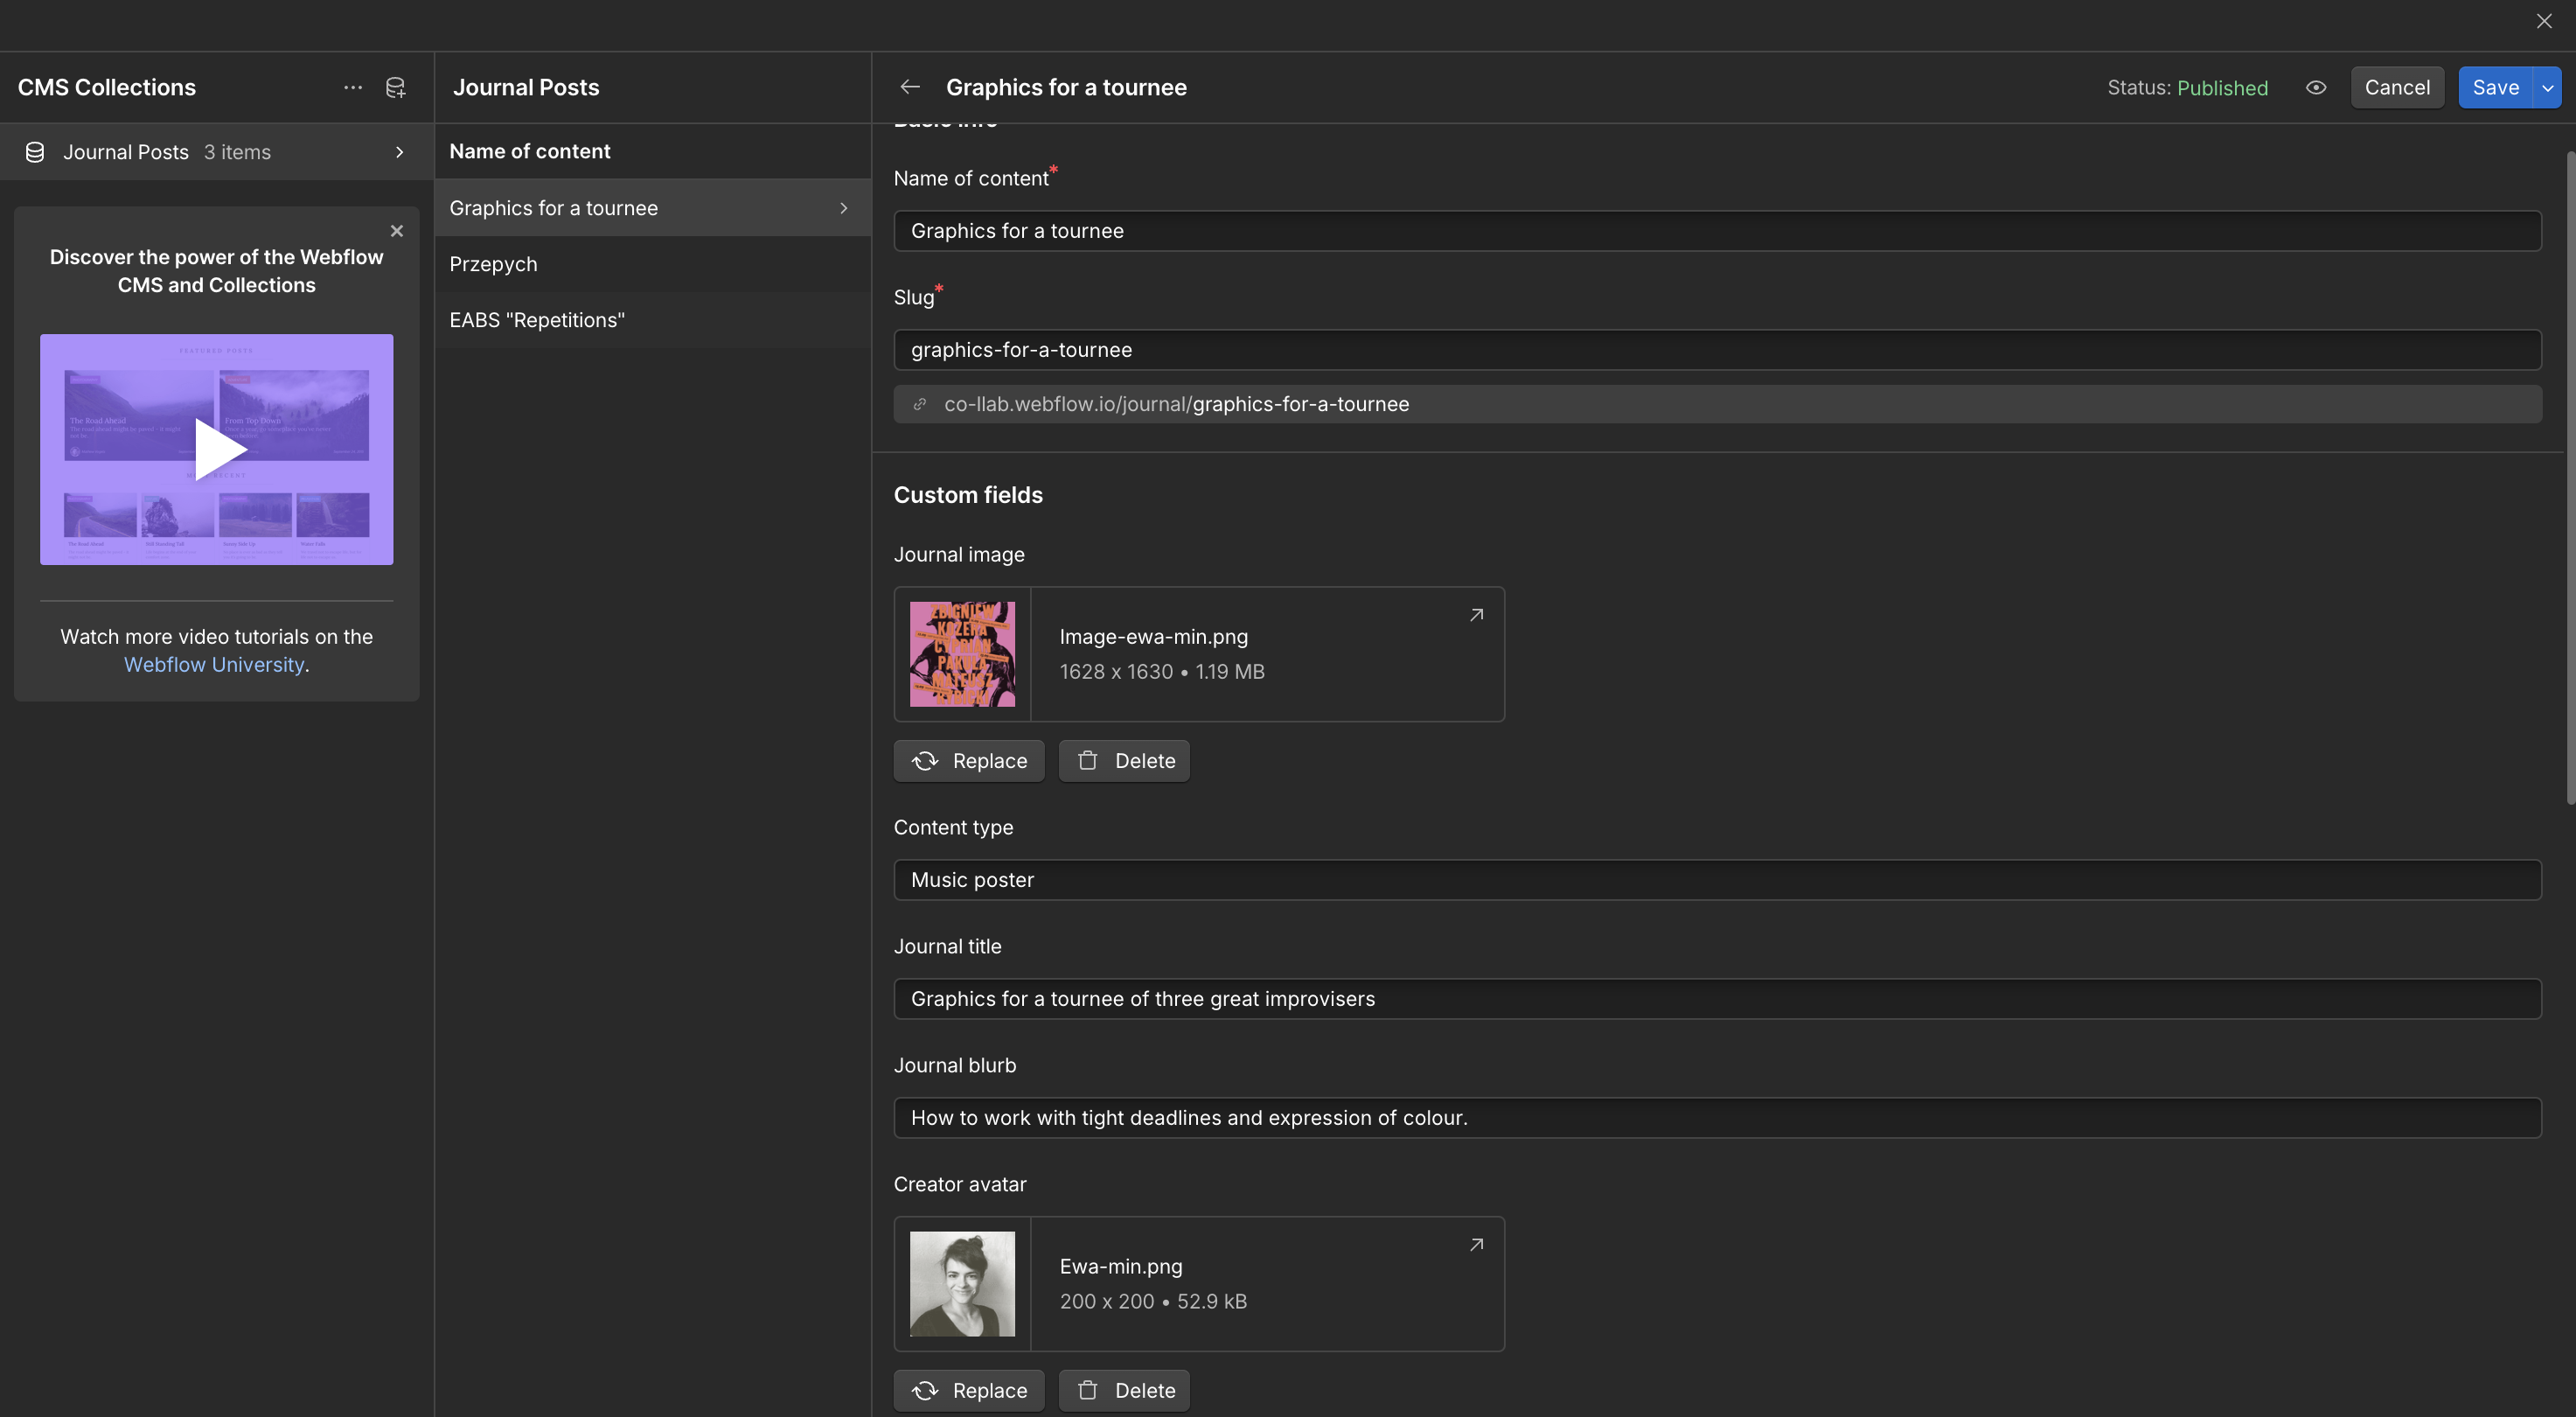
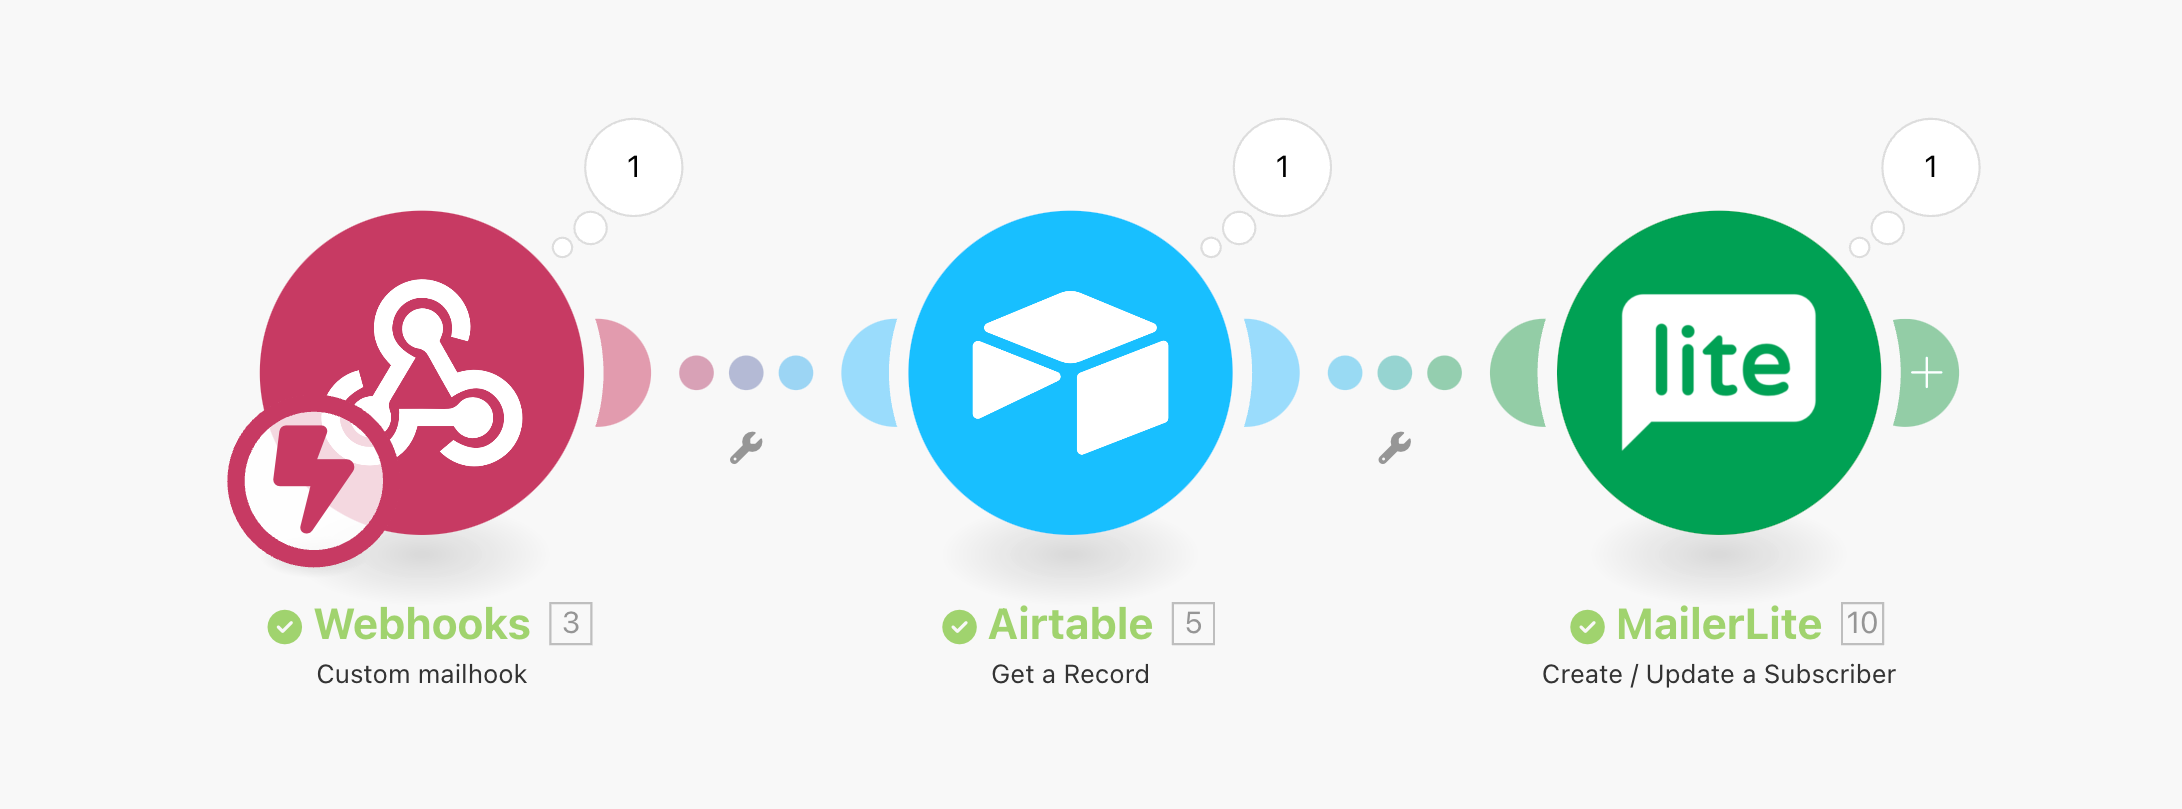
One of the most powerful aspects of automation was the ability to update CMS content directly from Airtable. To achieve this, I set up a webhook that allowed Airtable and Make to communicate. It acted like a button, ready to be pressed. Once the content was prepared and reviewed in Airtable, a creator would press the button, automatically creating or updating the content on Webflow (if an item with the same ID already existed) and publishing it on the website.
Before joining the no-code and automation bootcamp, I believed that creating an online shop was exclusive to serious entrepreneurs. I couldn’t have been more wrong. No-code makes it accessible to anyone. Setting up and customising Stripe and EasyCart couldn’t be easier. Purchase confirmation emails? No problem. The biggest challenge for me was importing a database of items sold and linking clients to their purchases automatically. After many failed attempts, trials and errors with different tools I finally made it work.
Marketing is something none of us are passionate about, but it’s necessary to keep the business going. Automation comes to the rescue, whether it’s scheduling social media posts or writing blog entries with the help of AI and posting them directly on the website. As great as it was to see everything working, getting OpenAI to understand the text in my Airtable was a bit tricky. With one last push before giving up, I managed to solve my problems with the Text Aggregator.
Wrapping up
While no-code and automation have their limitations and are better suited for small businesses rather than large ventures with extensive client databases, they provide an excellent starting point. With no-code, you can lay out your ideas and get started quickly. Didn’t build something that meets your expectations? Worry not—your time and money investment isn’t significant enough to fear starting from square one.
How did it turn out for me? I ended up building a fully functional homepage and I feel fully equipped the skills and knowledge to create an automated platform. As expected, I didn’t stick with the initially planned functionality. For the website launch, I most likely wouldn’t include half of the features I worked on during the course. Why?
Some functionalities were created for learning purposes, and, as is often the case, these projects tend to evolve organically. It’s challenging to predict how users will interact with your product, but that’s the beauty of it—you can learn as you go. As Natalie Pilling, instructor of the course says, “start small, solving one problem at a time; embrace the micro-MVP, launch fast, iterate faster; keep it simple; expand gradually, not explosively; don’t fear the rebuild.”
Product Design and automation
But how is all this useful for Product Design? In many ways, it’s all interconnected. Since it's quite difficult—if not impossible—to define a solid data structure from the start, it almost forces a lean approach where you can learn quickly based on real data. This allows to verify with users whether what you’ve built has legs to stand on. No-code and automation provide a different perspective; they enable you to immerse yourself in the project fully and view it from all angles.
If I ever had a client with a small-scale project, I would likely explore no-code and automation to test a real product with its audience as soon as possible. No-code and automation make this accessible and affordable for anyone, even those without deep pockets for development work.

© Magdalena Wisniewska → 2024
General conditions